Table of contents
Open Table of contents
context
i’ve been doing software for the past few years in startups. with llms on the roll and being on a career break, i thought why not switch gears for a bit to get into hardware.
it can’t be that hard.. right?
i wanted to build a temperature and humidity sensor to track what are the numbers like in my workspace.
turns out this is fairly common, and it’s also known as a weather station. so after a quick google search i figured out that i needed a few parts:
- esp-32 - microcontroller / small computer to link with the DHT22
- dht-22 - the temperature and humidity sensor
- wires - to connect the esp-32 and dht-22
- breadboards - for prototyping without soldering
no drones or robots as my first project as it’ll distract me from the goal of having exposure and learning how to build IoT items as a beginner.
purchasing the components
with the list in mind, i headed down to sim lim tower to purchase the components and shockingly it costed roughly 50 SGD.
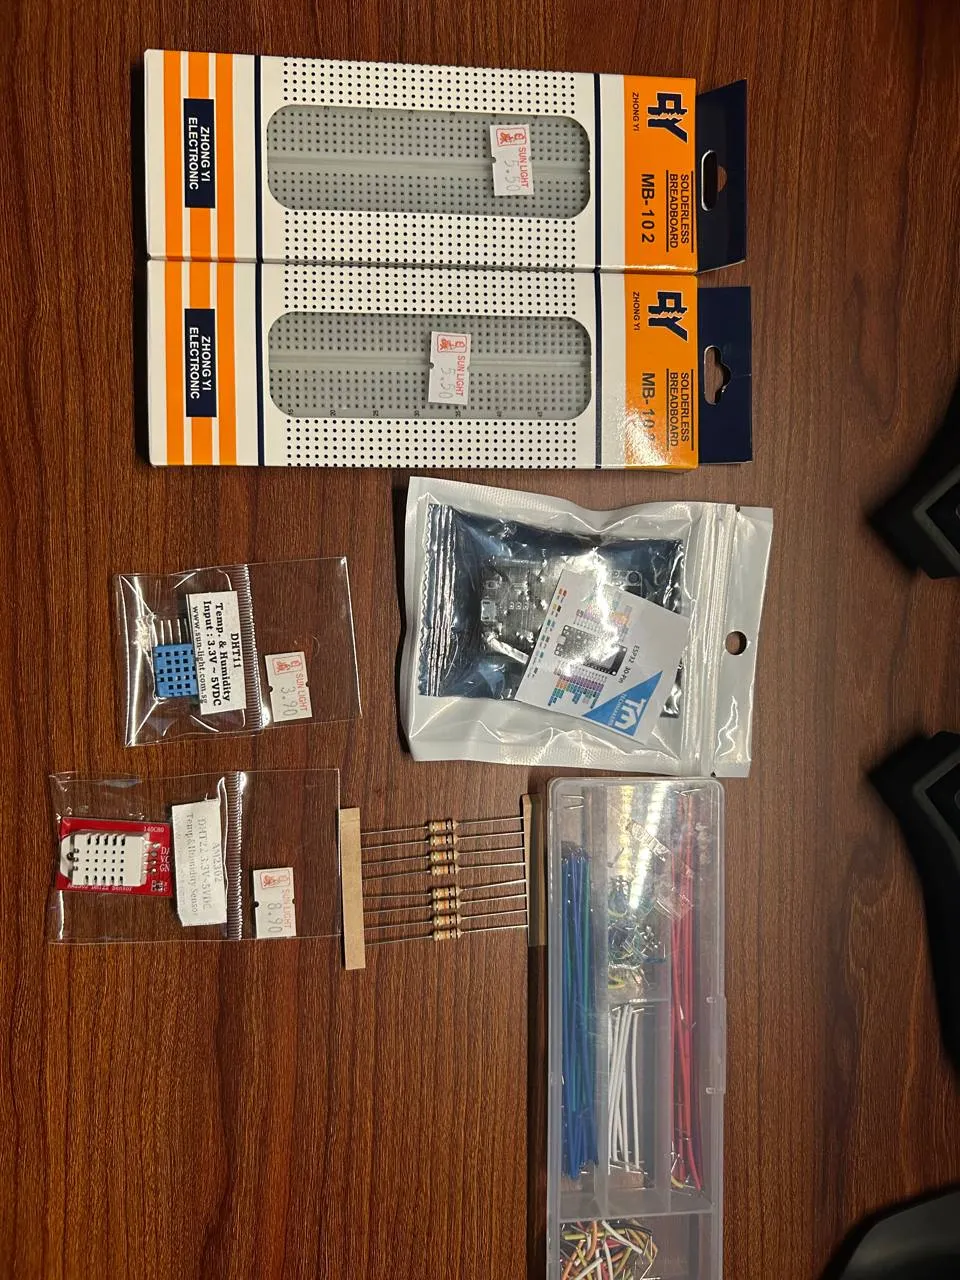
and i was pissed off, like “did i just spent 50 SGD to buy so little parts!?”. what added to the fuel was that i realised other shops were selling at a 20-40% difference from the current shop i bought.
so looking back, buying parts from a physical store is quite expensive and I could’ve gotten the parts i needed and more at a lower rate if I bought it from online platforms.
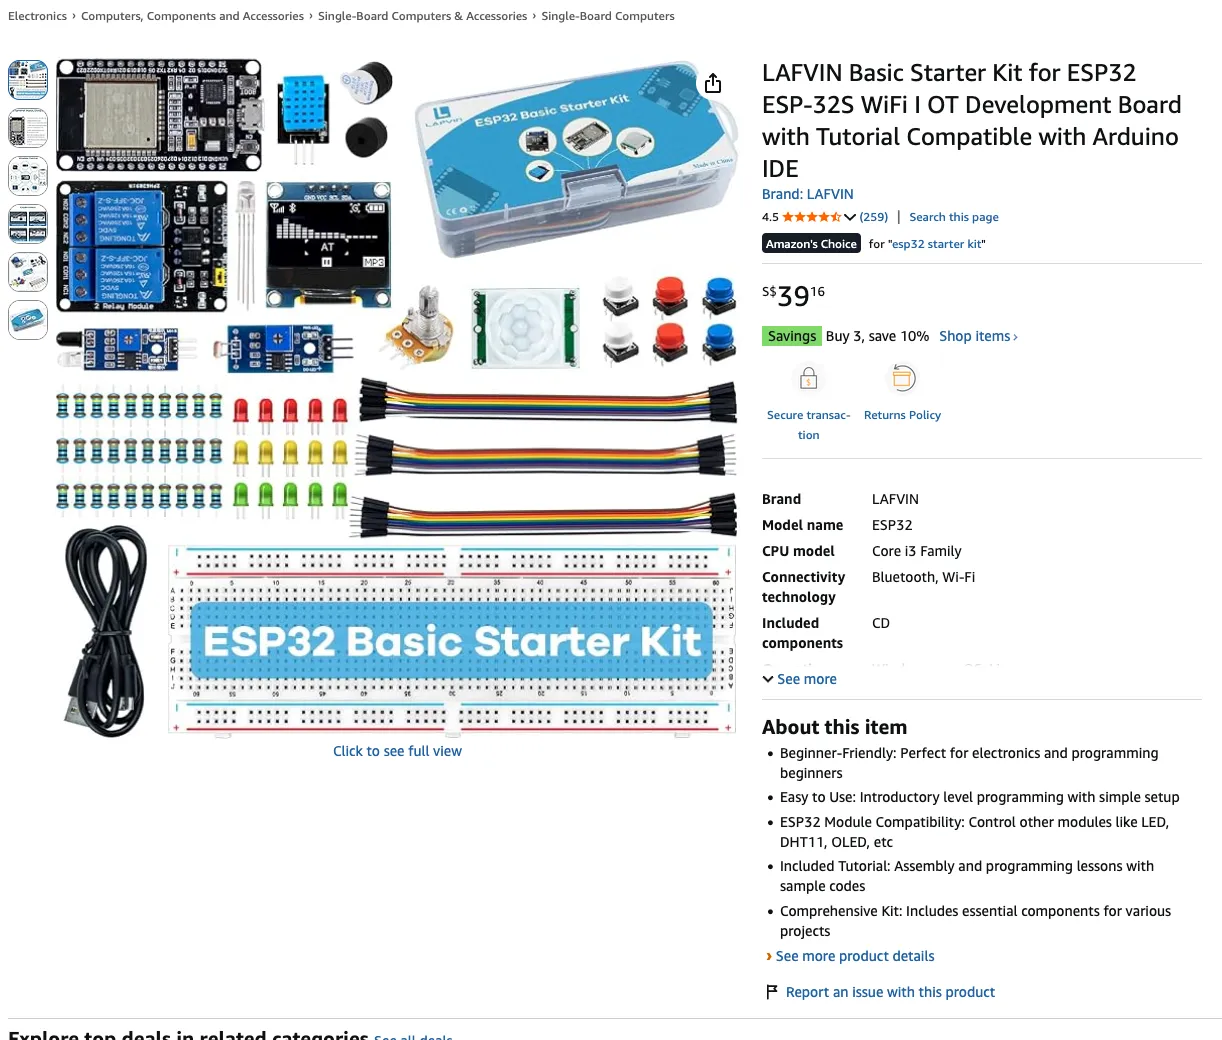
especially if i’ve bought beginner kits, from online platforms. these starter kits contains quite a number of components for around 20-30 SGD, such as:
- breadboard
- esp 32
- jumper wires
- a variety of sensors
- a variety of resistors
it’s a bang for your buck. and a lesson i etched to my heart.
going to sim lim tower or any physical hardware store to purchase components is a last resort! unless you can’t wait for shipping and need the parts as soon as possible.
online platforms
there are generally two platforms to purchase from
- shopee
- amazon.sg
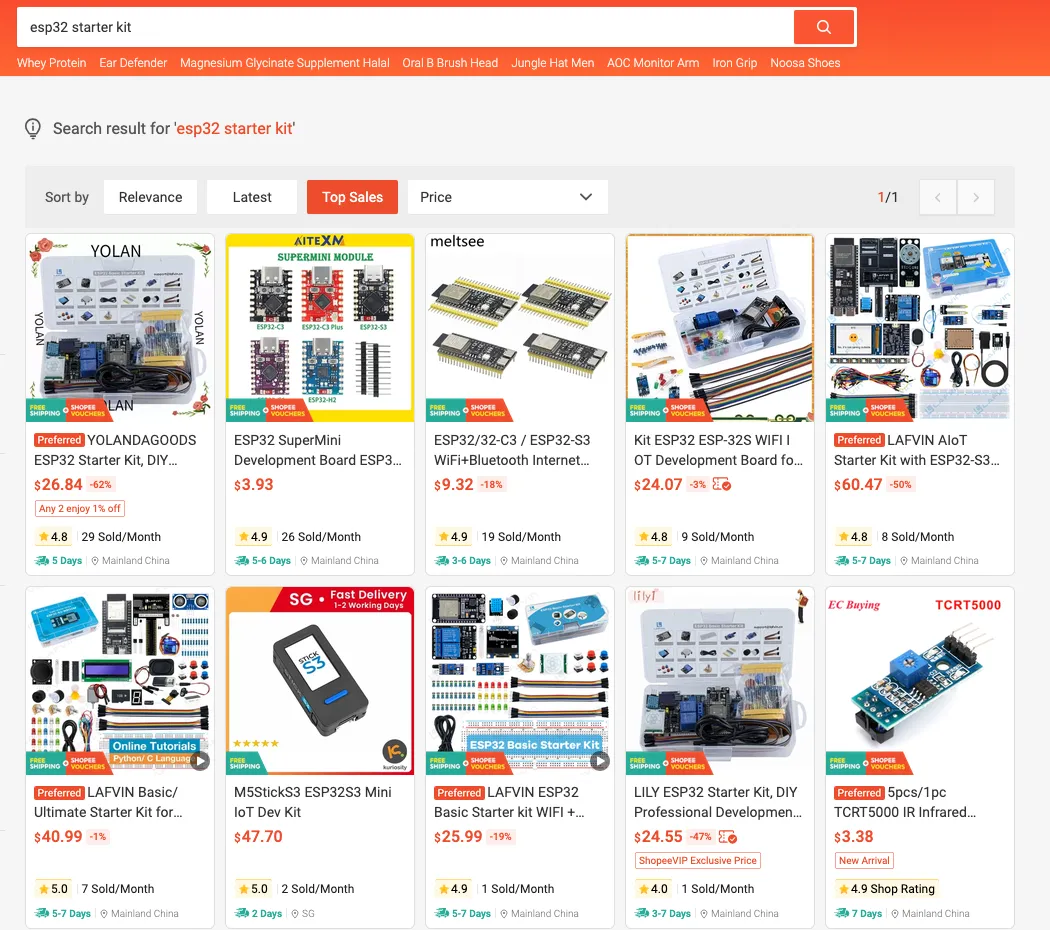
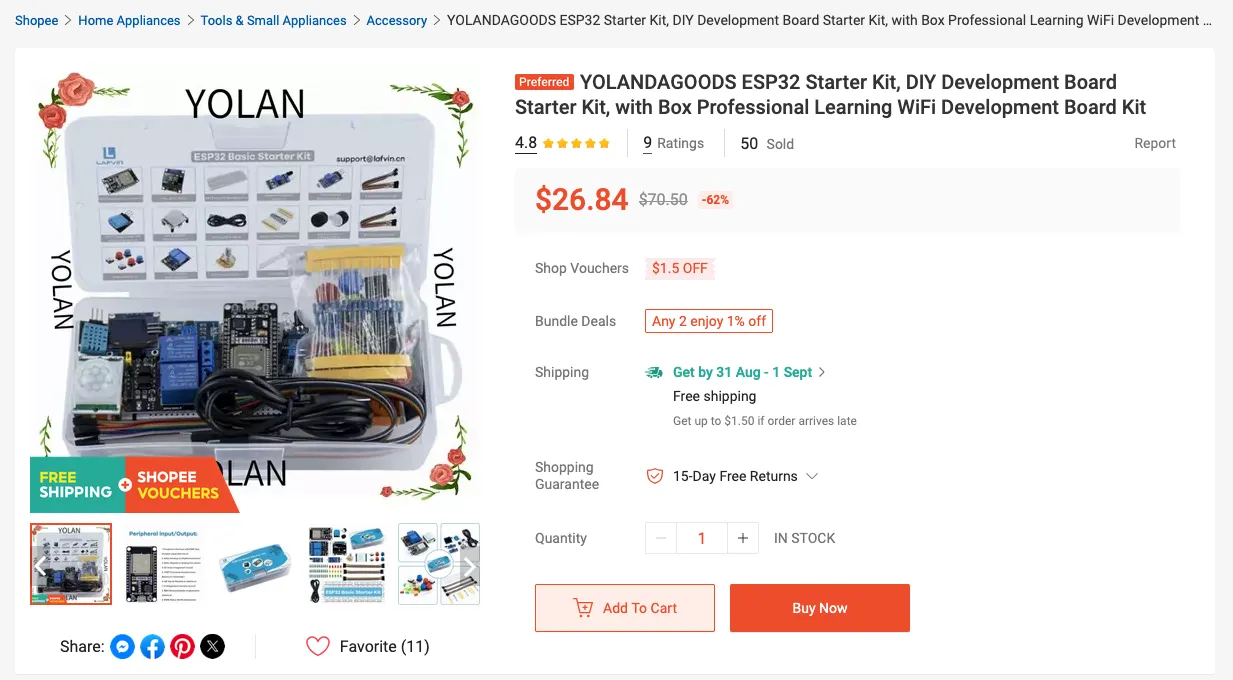
on the these platform, search for “esp32 starter kit” or “electronics starter kit”. and you’d be presented with so many options! just choose one that seem to fit your needs
shopee
https://shopee.sg/search?keyword=esp32%20starter%20kit&page=0&sortBy=sales
amazon
amazon is generally much more expensive than shopee
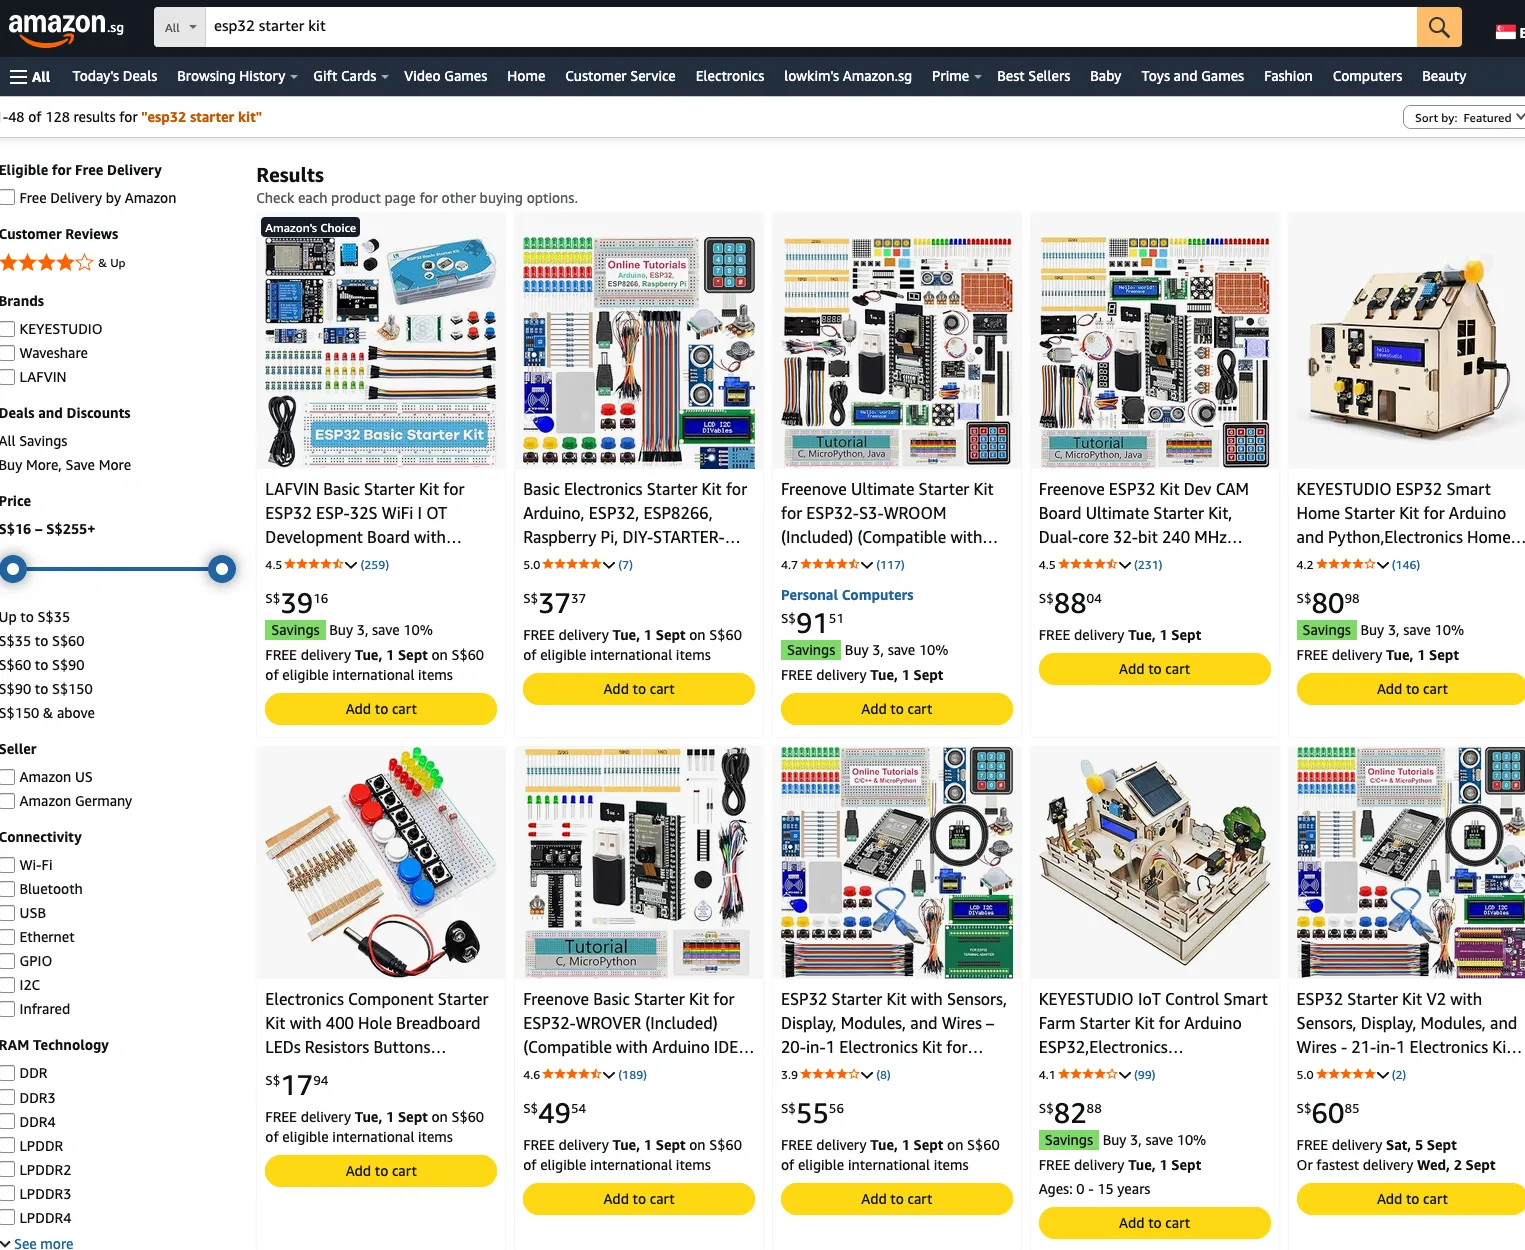
https://www.amazon.sg/LAFVIN-Starter-Development-Tutorial-Compatible/dp/B0BVZBTP8V
prototyping in hardware
enough mulling. with the parts in hand, it was time to get my hands dirty.
i wanted to bring the experience of “build fast, ship small” from software to hardware. i didn’t want to solder the components and wire everything up only to find that it doesn’t WORK. and then proceed to desolder everything to figure out what’s wrong.
this is the same as building out an entire feature in software land, merging it to production and then figuring out the feature you ship DOES NOT WORK. causing you to spend extra time to figure out why, with the extra pressure of answering to customers and stakeholders.
not fun.
building small, and shipping fast in software allows me to verify the stuff i’ve built actually works before shipping and if anything happens i can quickly revert it.
but luckily, hardware engineers thought of this a LONG time ago and they came up with a nifty tool called a breadboard.
breadboard
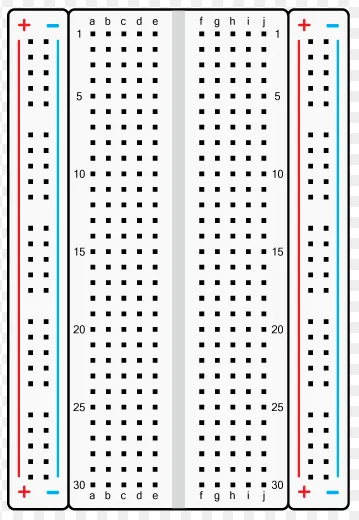
a breadboard contains multiple pins and metal rod running down the spine underneath it. this allows us to connect different components and wires together WITHOUT soldering, allowing people to iterate on their circuit easily.
i’ve no idea why this is called a breadboard this link for more details on the history and tutorial on how to use it.
also, if you’re interested in how it looks like internally look here
breadboard gotchas
just shove the components into the breadboard right?
yeah except that it was tight, the female pins are really tight on new breadboard to the point that i though the ones i purchased was fake.
so some force might be needed to push the components down, and it takes a while to “break in” the female pins
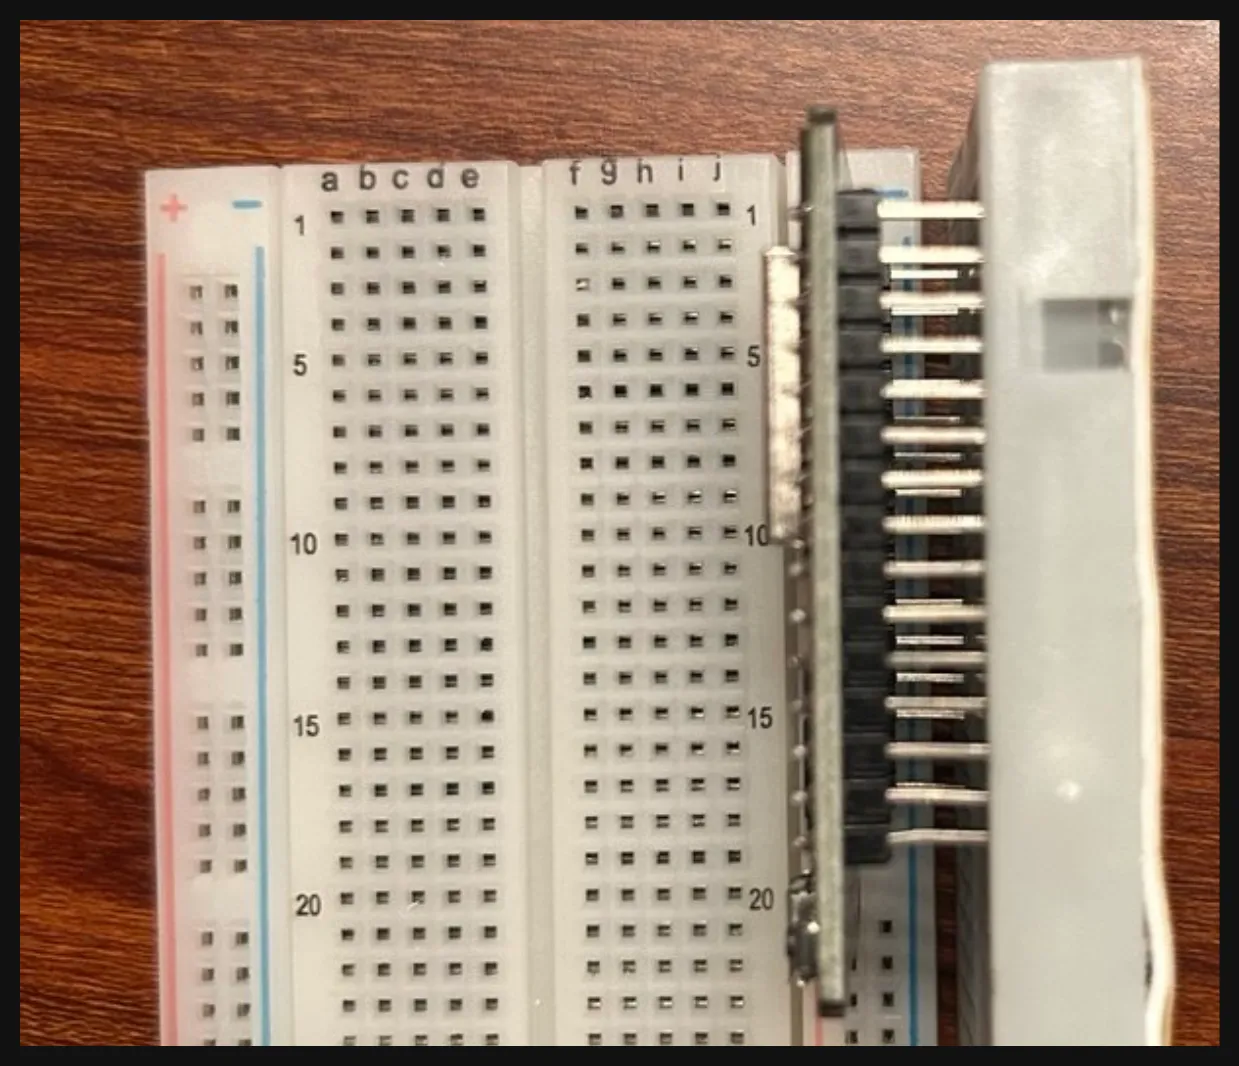
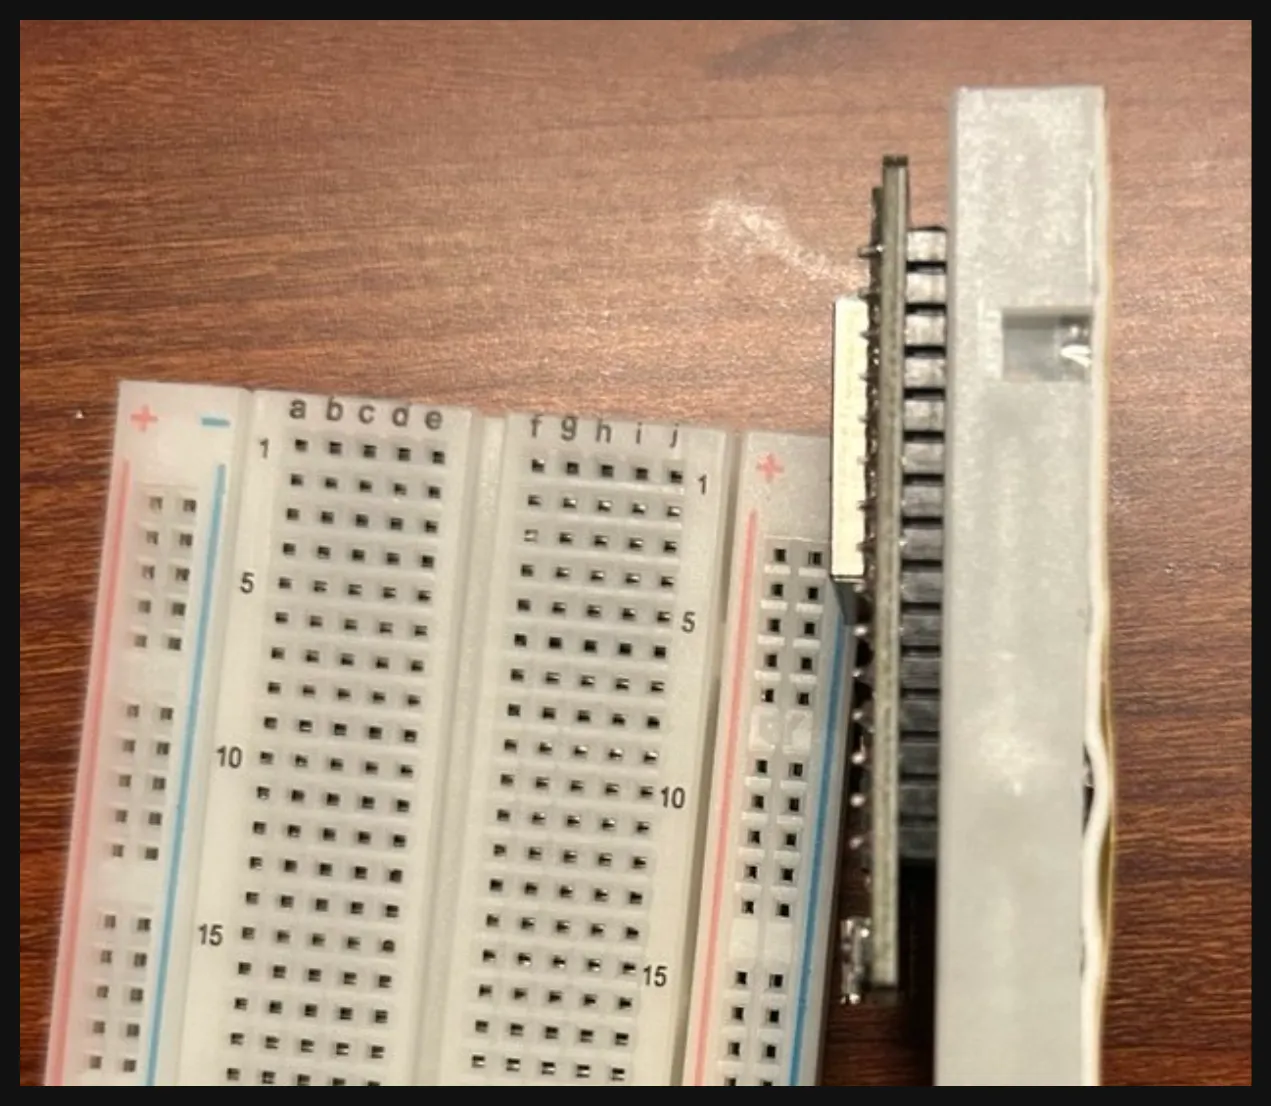
inserted components should be fully flushed into the board rather than “floating” on it.
not inserted
inserted
figuring out component pins
staring at the DHT22 and ESP 32 was frustrating. all i saw was labels that made zero sense to me.
ESP 32
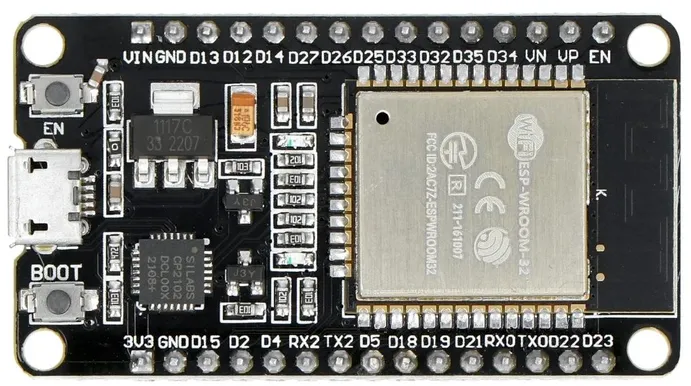
- what is VIN, GND, 3V3 and so on??
DHT22
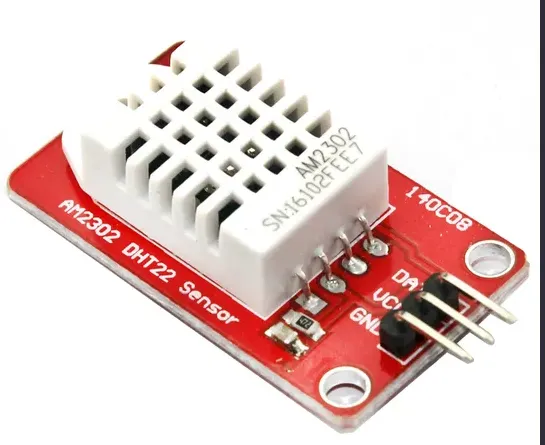
- what was VCA, GND and DATA??
i scratched my head for a long while, i knew they were pins and they had to mean something, nobody just connects the wires randomly and hope it magically works.
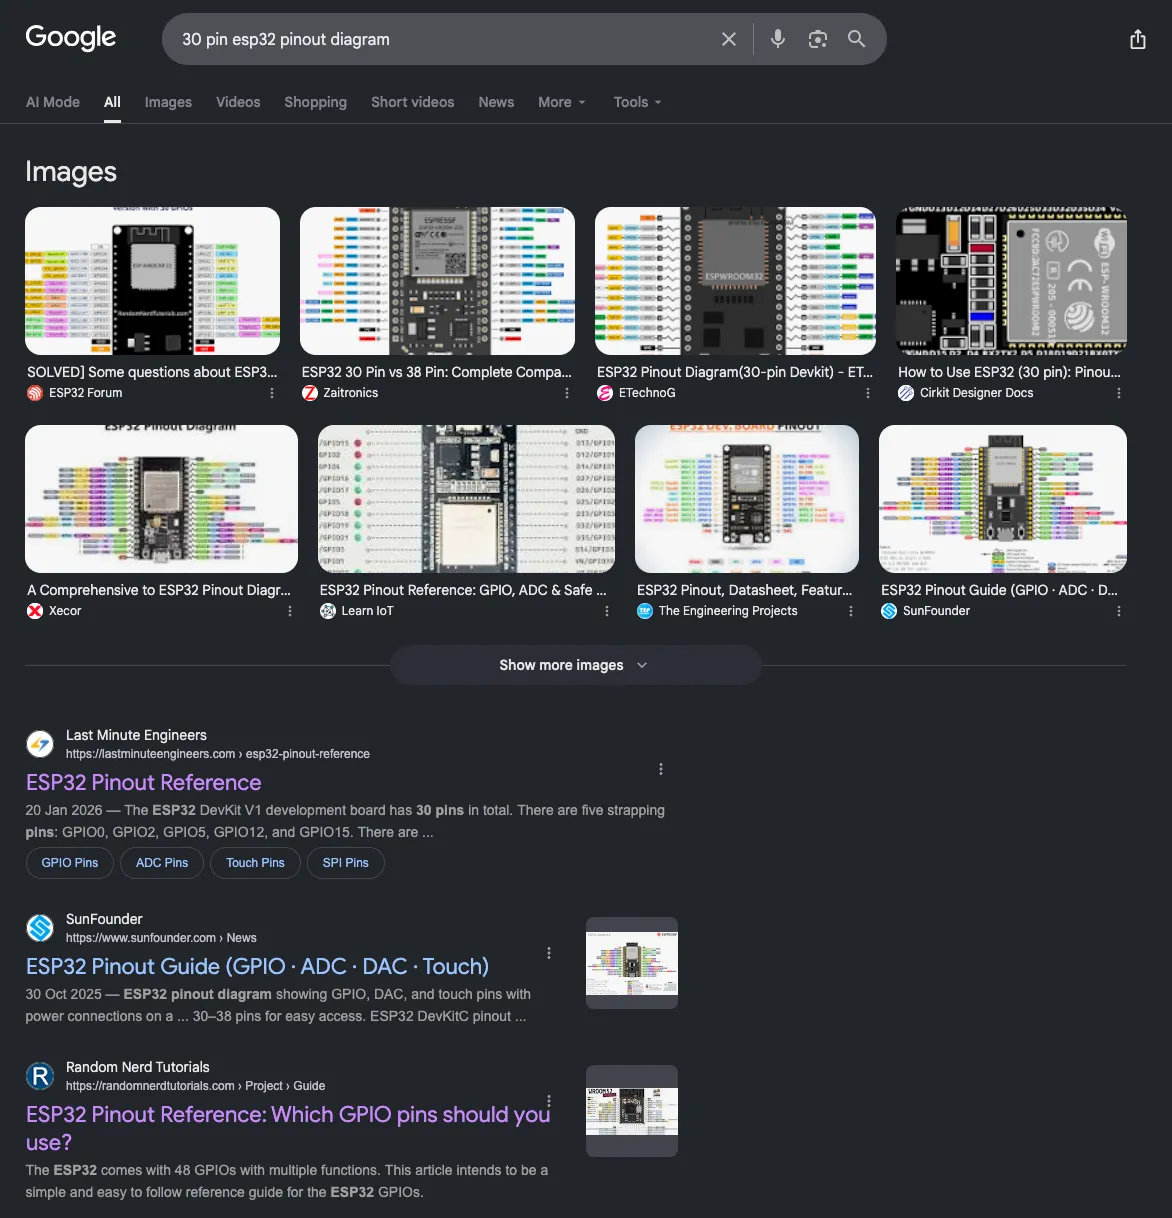
initially i went with the term “datasheet”, but the google search result was meh. but fortunately, after searching a few more times and tweaking the keyword, i landed with “pinout diagram”.
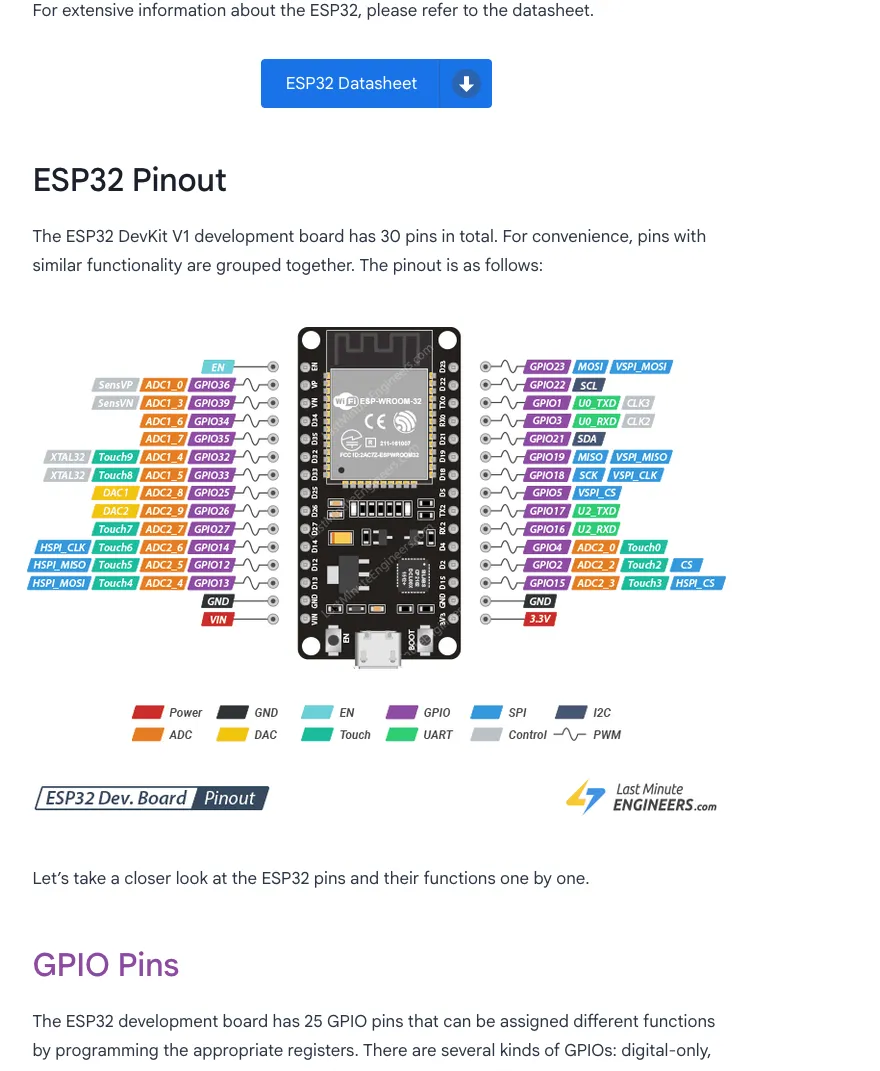
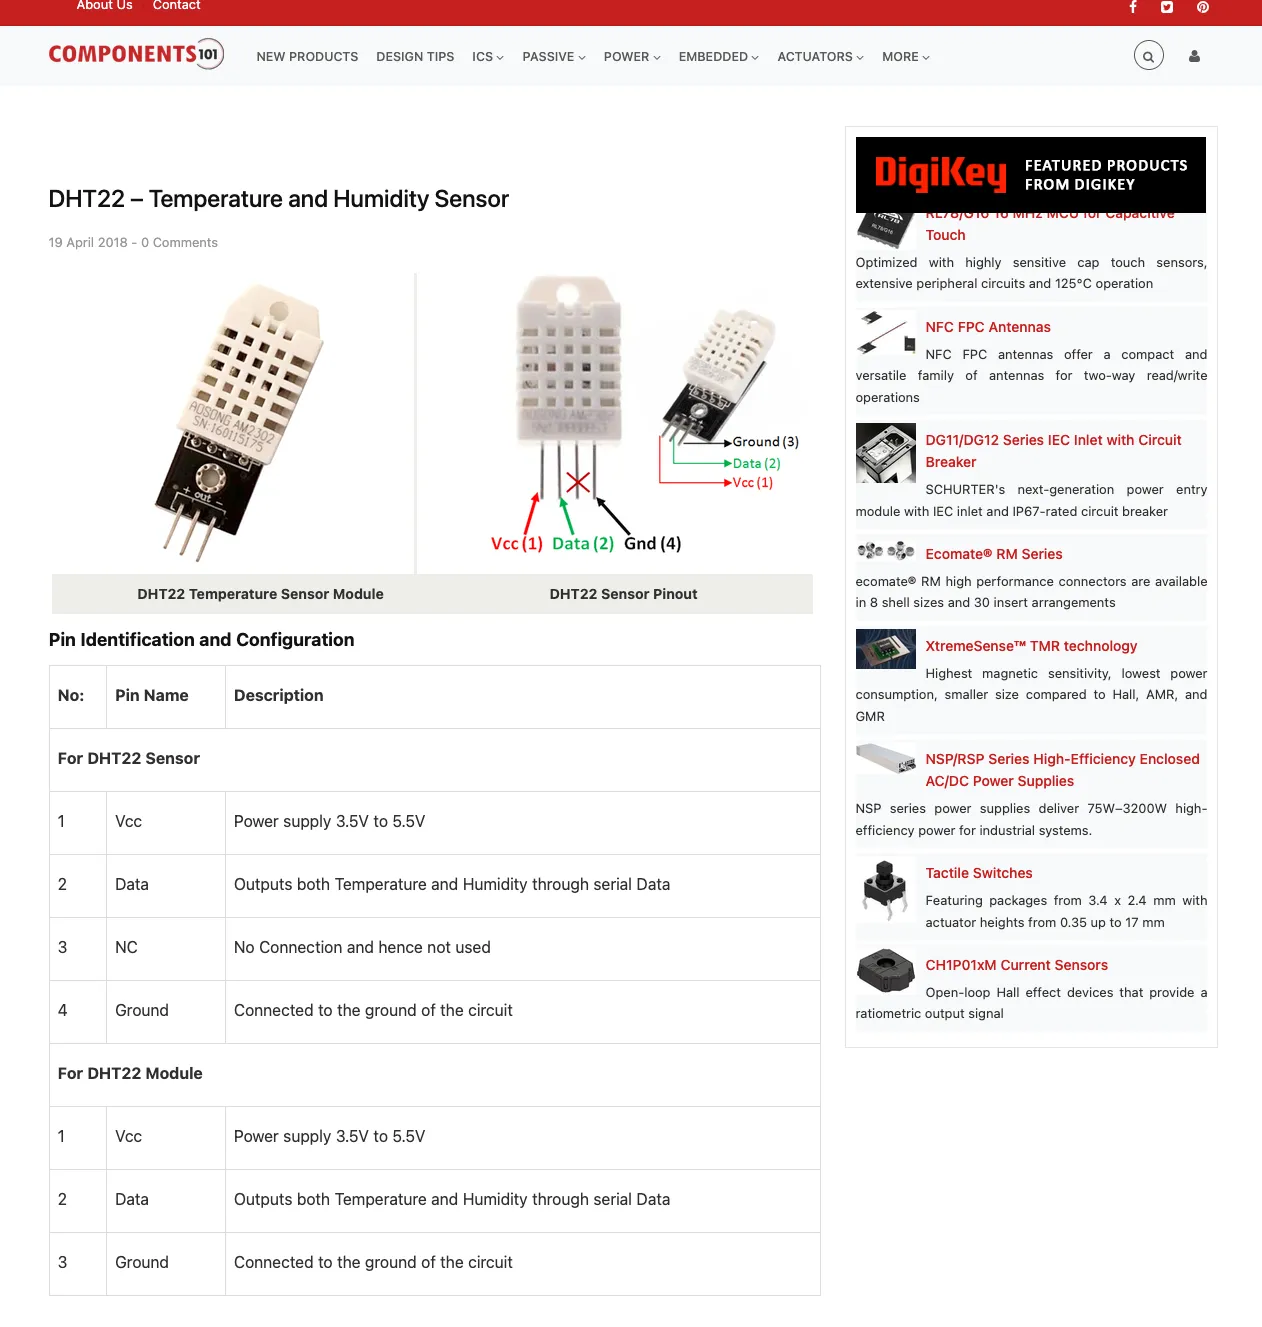
this was the money shot, i could use it to figure out how to connect different components together. in this case it’s a ESP 32 microcontroller to a DHT22 sensor.
so i searched pinout diagrams on google by typing <component name> pinout diagram
esp 32
“30 pin esp32 pinout diagram” returned the following results in google
by clicking on the result from “last minute engineers”, https://lastminuteengineers.com/esp32-pinout-reference/, contains a comprehensive list out pinout and description for each of them
dht 22
“dht22 pinout diagram” returned the following from google
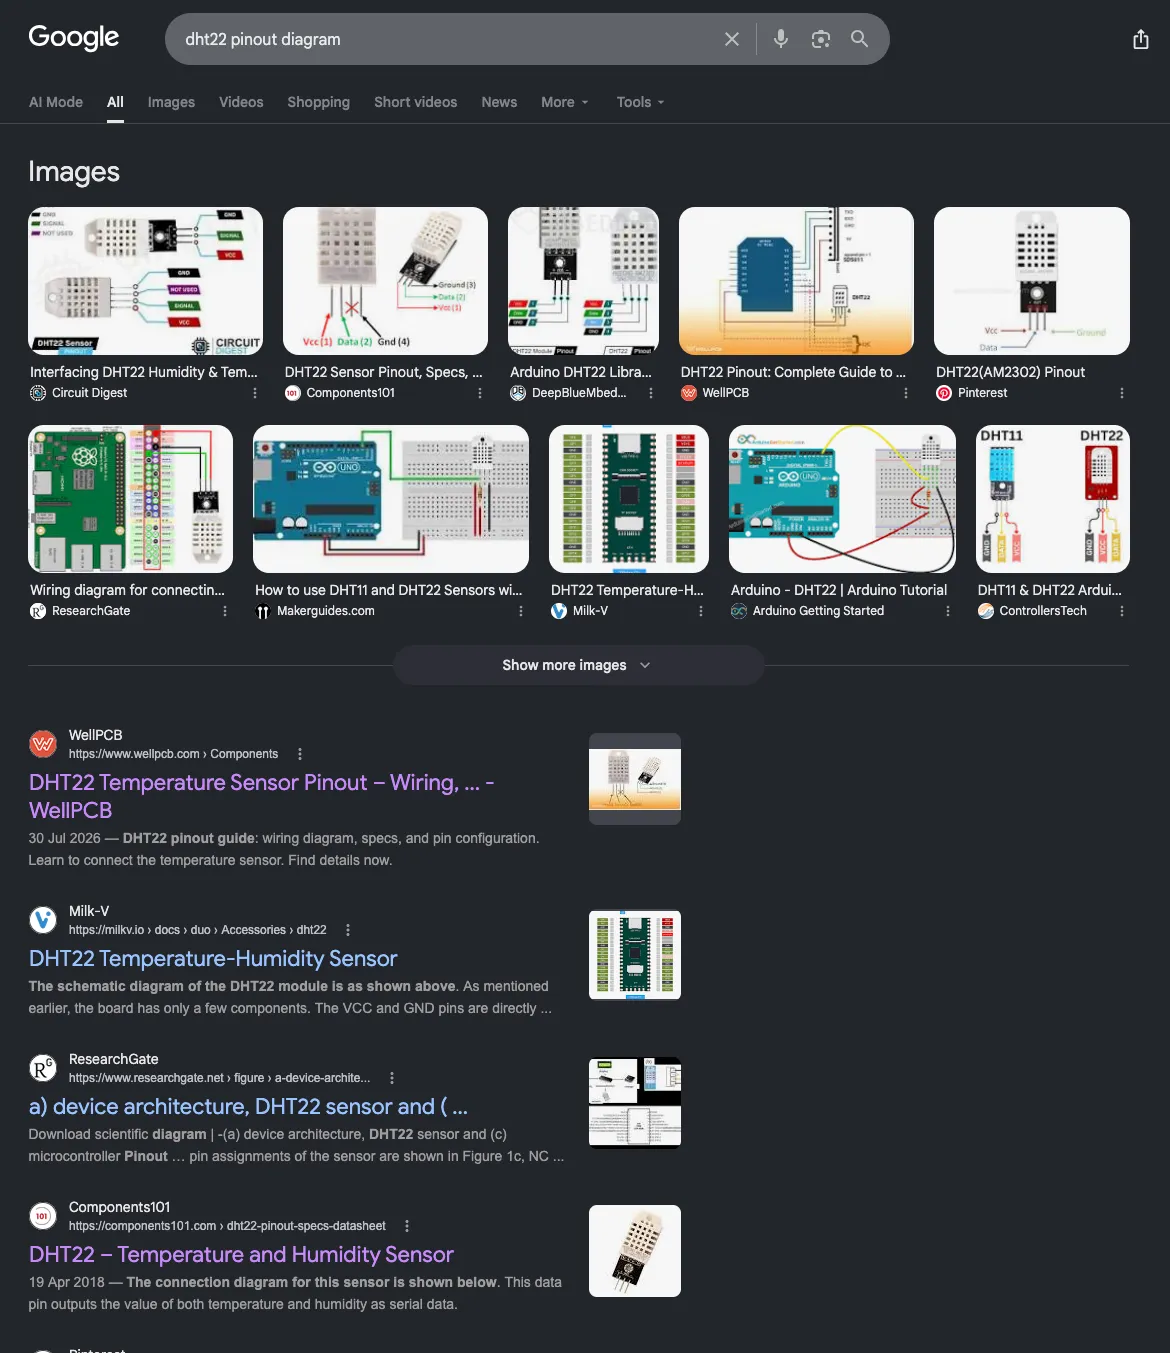
https://components101.com/sensors/dht22-pinout-specs-datasheet
visualising the connection
now at least i know what i’m looking at.
so with pinout references for each component in mind, i can look into connecting the esp32 to the dht22.
out of the 30 pins from the esp32, i focused on 3 pins:
- 3v3 pin - power supplied to dht22
- GND pin - ground pin to the dht22
- GPIO (General Purpose Input/Output) D5 pin - receiving data from the dht22
this is how the connection between the two components looked like:
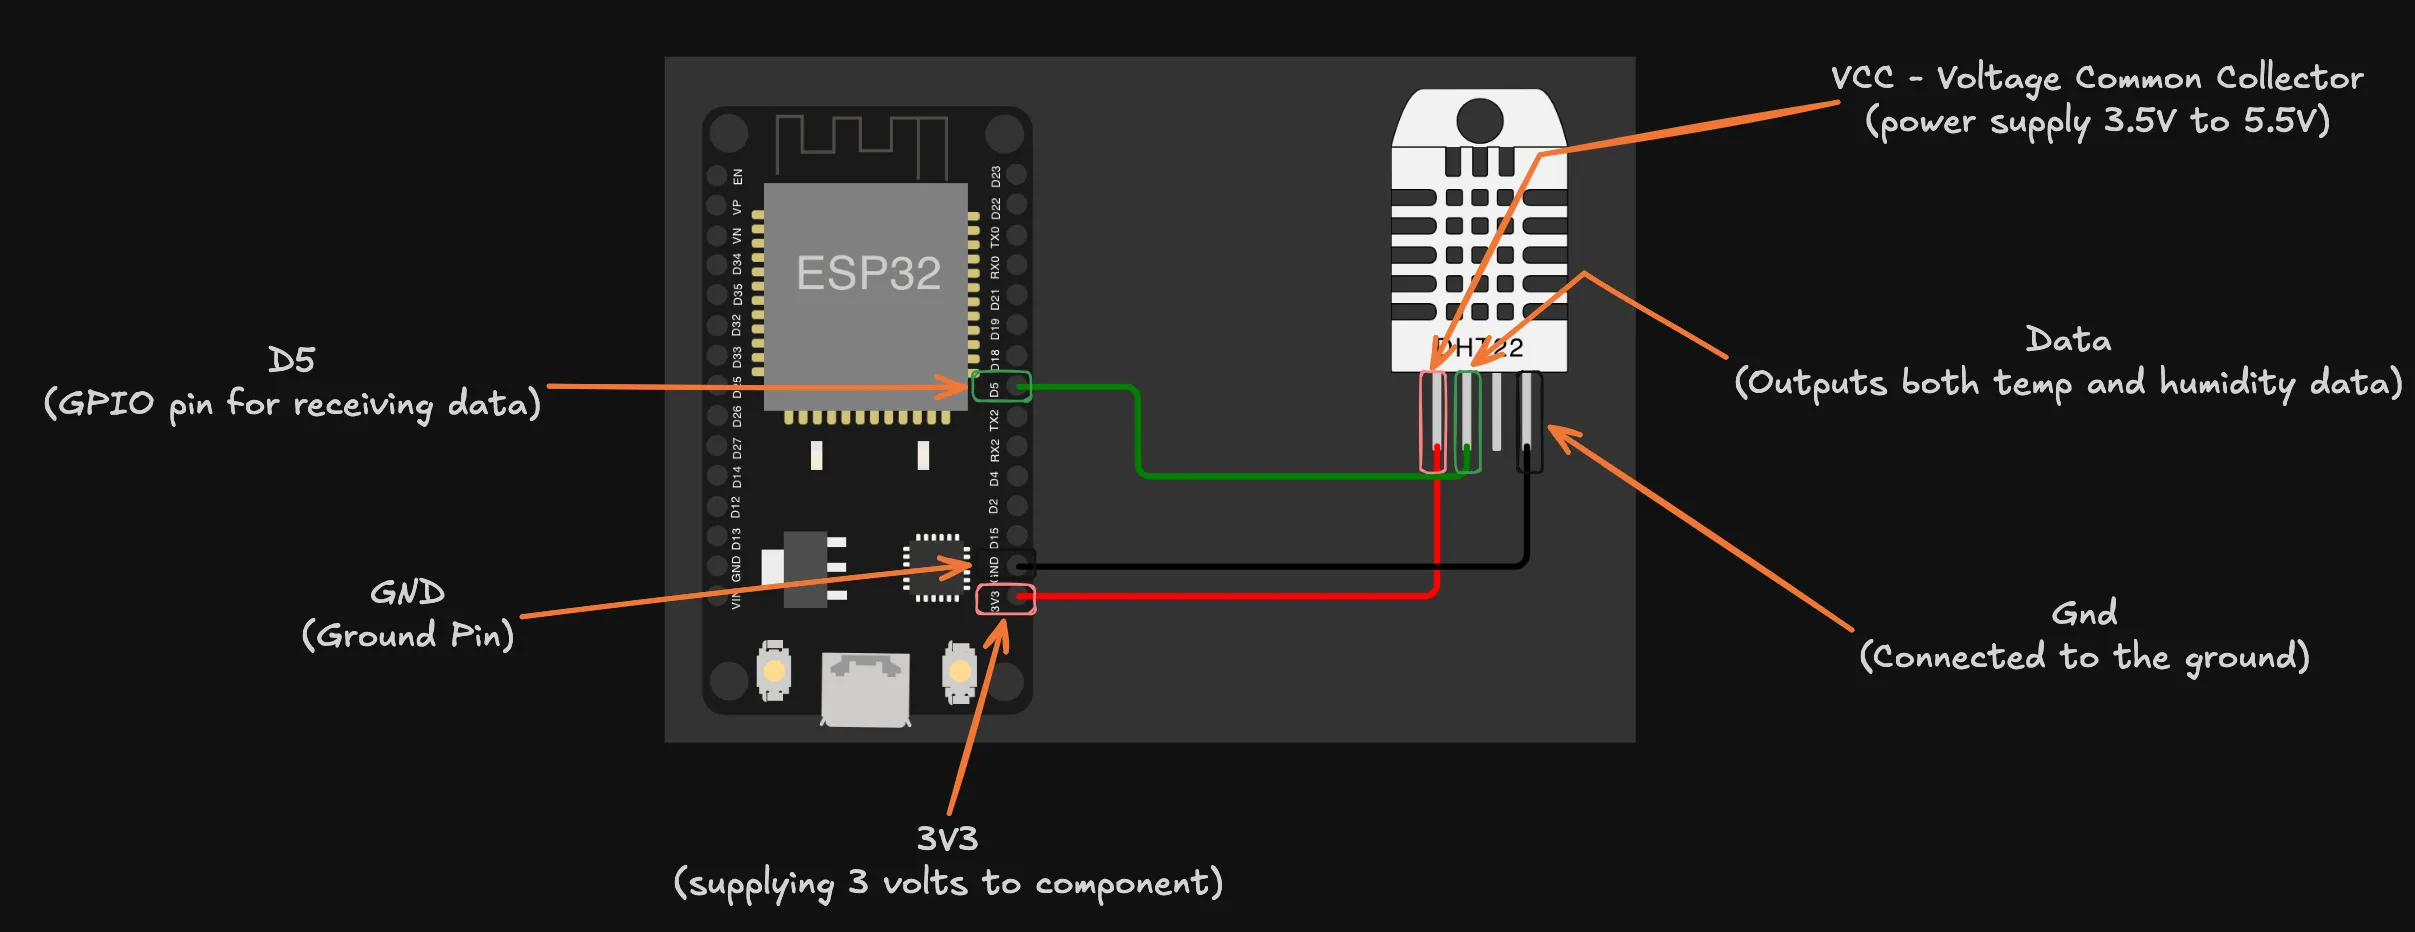
one pin from DHT22 is unused based on the pinout diagram
wiring the components
time to wire the components physically, i used the breadboard to sit both the esp32 and dht22 in place, and then i used jumper wires to connect it.
this is how it looks like
dht22 unplugged
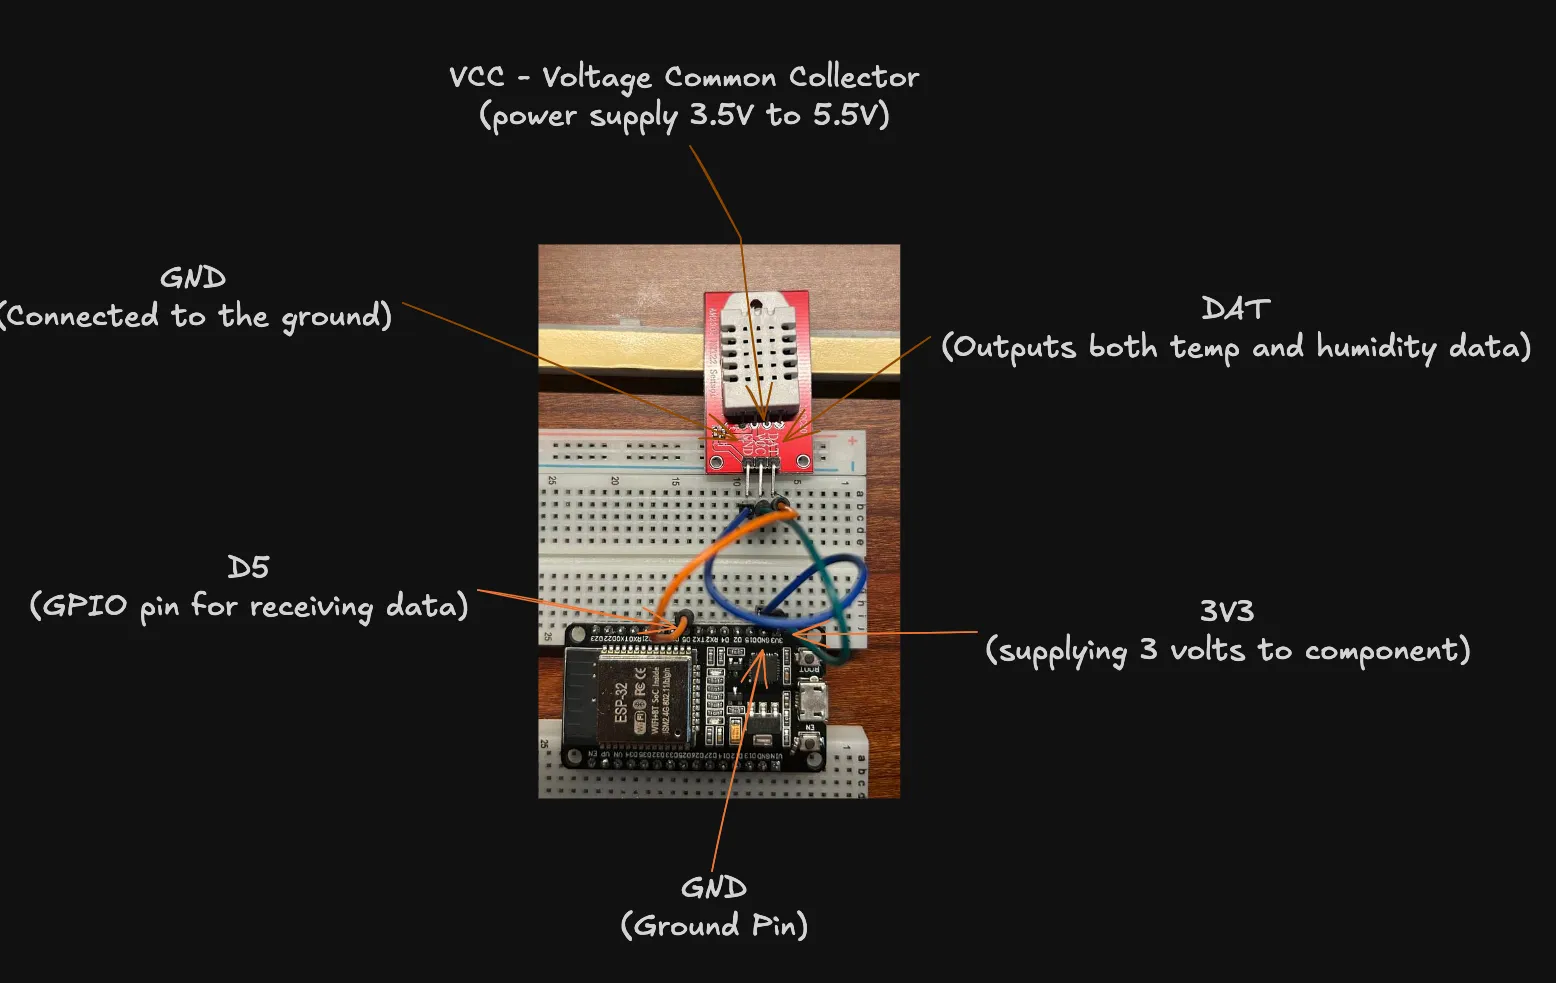
dht22 plugged
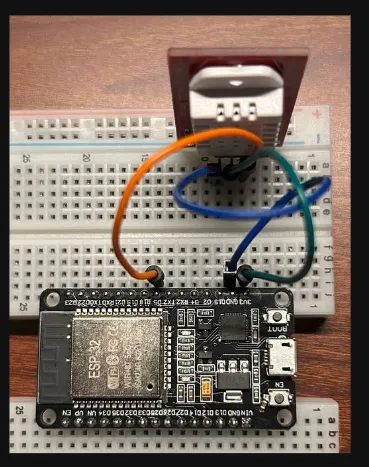
the esp32 is a chonky boi and it doesn’t fit on a full sized breadboard. so i needed to use two breadboard is used to ensure there’s enough space for the wires.
powering the esp 32
the esp-32 board uses a USB-A micro for power.
so i used a USB-A to USB-A micro cable to connect it to a power source like my laptop which can both serve as power and uploading the code to it.
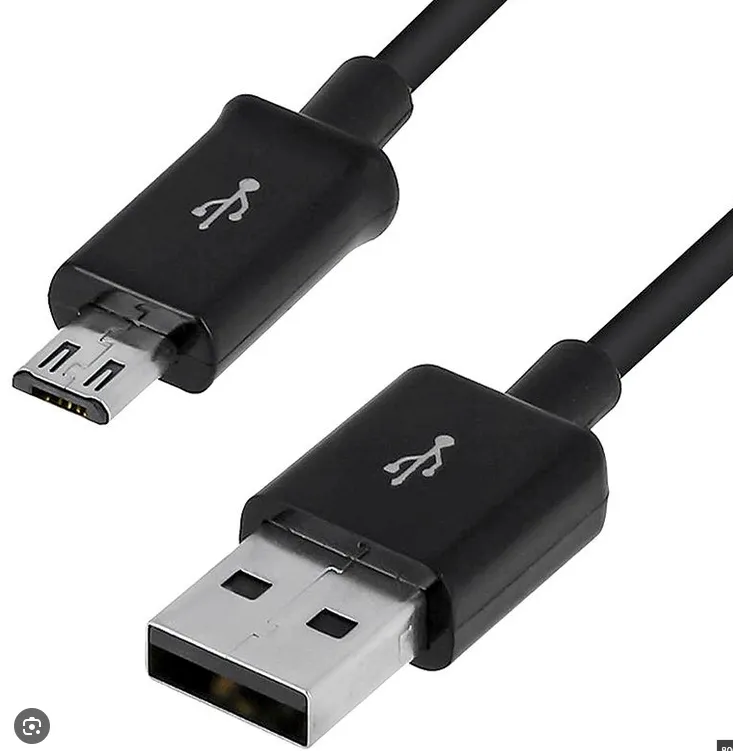
hooking up the esp-32 to a laptop USB A port looks like this
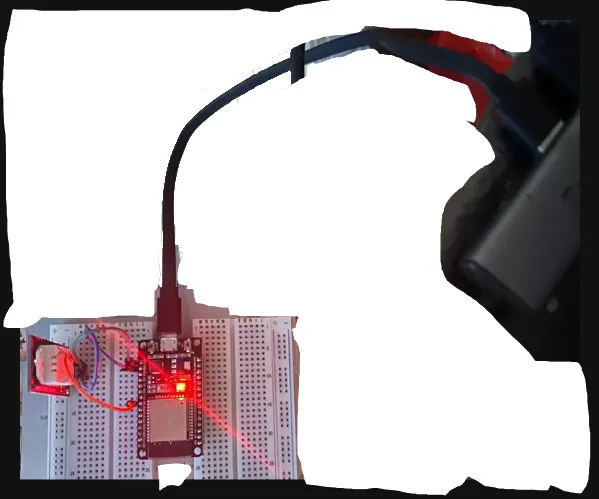 once the esp-32 is successfully connected, a red color led will light up.
configuring the components
esp32 with arduino ide
with everything connected, i need to program the esp32 to read data from the dht22. this is done via arduino ide and there’s a great tutorial by randomnerdtutorials which goes through how to set it up arduino ide with an esp32.
at least for this esp32, there’s no hot reloading like software. just pressing save and uploading the code to the esp32 doesn’t trigger a change.
i was dumbfounded as to why and i only figured out that i need to press a button called BOOT on the esp32 after reading the troubleshooting section by randomnerdtutorials
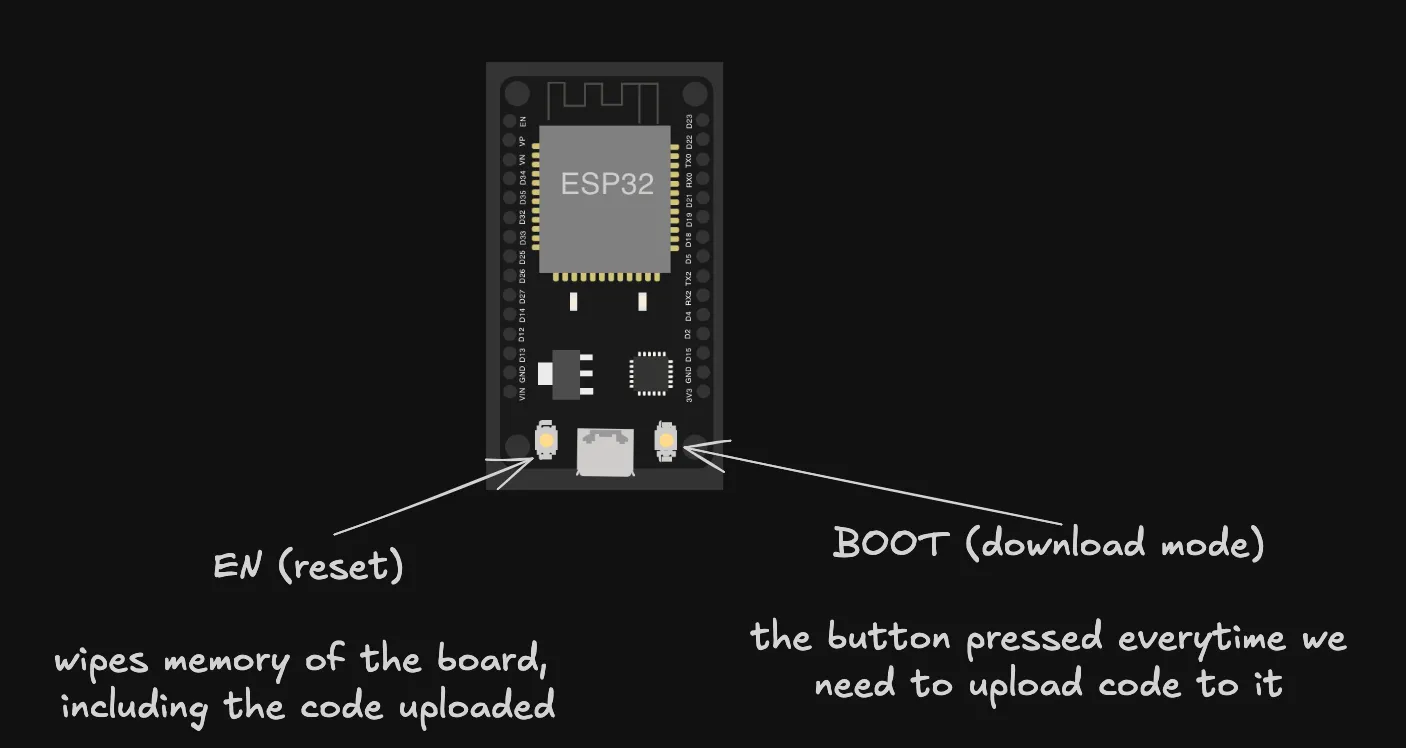
BUT, i needed to manually press boot EVERYTIME i changed the code in order to upload it. this was so annoying, however randomnertutorials published a fix for this annoyance.
i didn’t address this because it’s slightly more advanced, requires soldering on the esp32 and a capacitor (which i don’t have) to achieve it.
dht22
with esp32 setup, i needed to configure a dht22 library within the environment, much like importing packages (axios, pathlib) in node or python.
installing library and figuring out the name
a sensor specific library is installed by going to the left sidebar > “Library Manager” and search for “DHT Sensor Library”
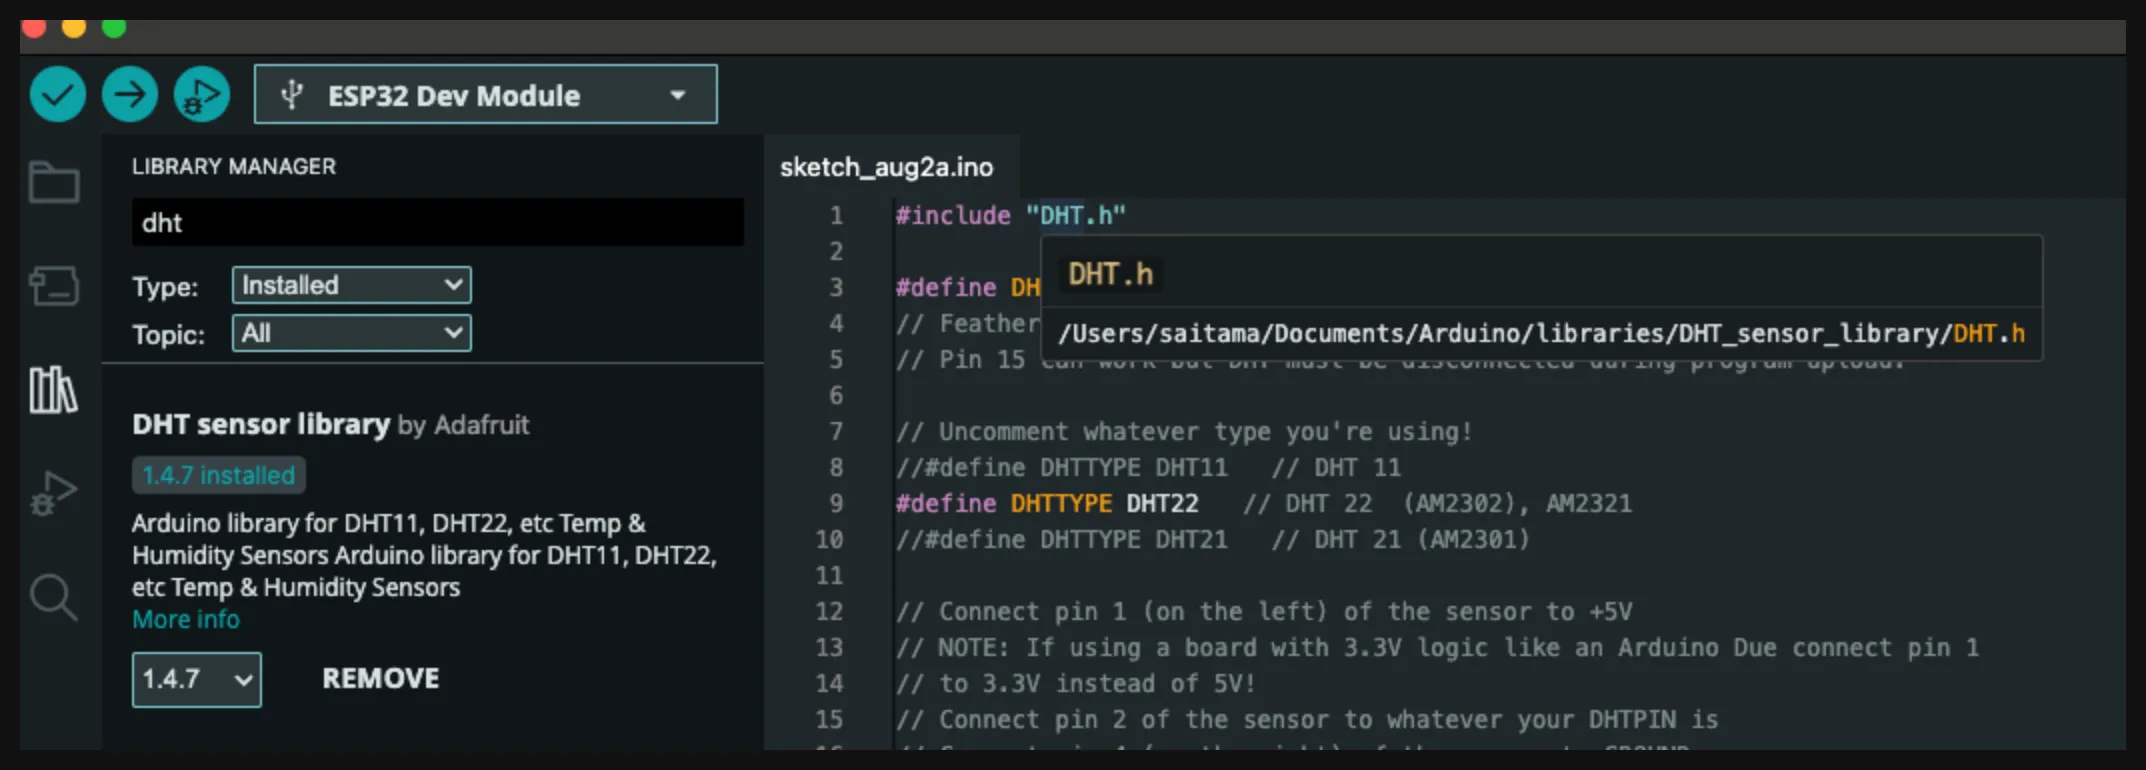
to figure out the package name, i checked the example provided by the library
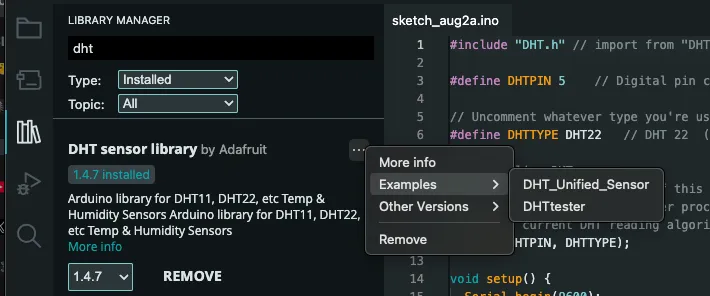
i clicked on “DHTtester”, and the following program showed up with the proper include statement
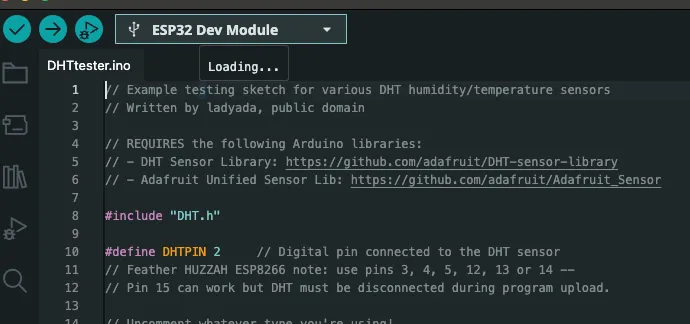
the code
i grabbed the code from the dht22 example above, and set the DHTPIN variable to what is connected to the esp32 which is GPIO D5, but the number 5 will do.
if this isn’t set, it’ll not be able to read the data coming from the DHT22 because the code is pointing to the wrong pin
#include "DHT.h" // import from "DHT sensor library"
#define DHTPIN 5 // Digital pin connected to the DHT sensor on ESP32
// Uncomment whatever type you're using!
#define DHTTYPE DHT22 // DHT 22  (AM2302), AM2321
// Initialize DHT sensor.
// Note that older versions of this library took an optional third parameter to
// tweak the timings for faster processors.  This parameter is no longer needed
// as the current DHT reading algorithm adjusts itself to work on faster procs.
DHT dht(DHTPIN, DHTTYPE);

void setup() {
  Serial.begin(9600);
  Serial.println(F("DHTxx test!"));

  dht.begin();
}

void loop() {
  // Wait a few seconds between measurements.
  delay(2000);

  // Reading temperature or humidity takes about 250 milliseconds!
  // Sensor readings may also be up to 2 seconds 'old' (its a very slow sensor)
  float h = dht.readHumidity();
  // Read temperature as Celsius (the default)
  float t = dht.readTemperature();
  // Read temperature as Fahrenheit (isFahrenheit = true)
  float f = dht.readTemperature(true);

  // Check if any reads failed and exit early (to try again).
  if (isnan(h) || isnan(t) || isnan(f)) {
    Serial.println(F("Failed to read from DHT sensor!"));
    return;
  }

  // Compute heat index in Fahrenheit (the default)
  float hif = dht.computeHeatIndex(f, h);
  // Compute heat index in Celsius (isFahreheit = false)
  float hic = dht.computeHeatIndex(t, h, false);

  Serial.print(F("Humidity: "));
  Serial.print(h);
  Serial.print(F("%  Temperature: "));
  Serial.print(t);
  Serial.print(F("°C "));
  Serial.print(f);
  Serial.print(F("°F  Heat index: "));
  Serial.print(hic);
  Serial.print(F("°C "));
  Serial.print(hif);
  Serial.println(F("°F"));
}
the outcome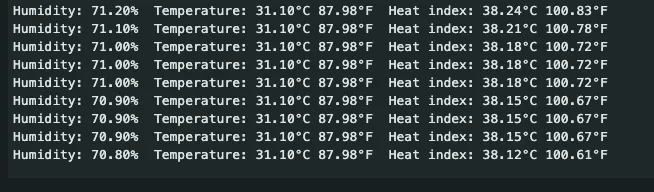
after uploading everything and trying figuring out how to upload stuff to the microcontroller, finally i see the numbers that was being outputted and yikes my workstation is humid and hot. worse possible combination.
takeaways
hardware is hard… and costly! if you don’t know where to look for parts.
but i enjoyed every part of the way, even though it cost me 50 SGD to figure out that i should’ve bought a kit from online platform, it’s forever etched in me to find for better deals when it comes to hardware and not just nab it off somewhere just because it convenient.
figuring out the pinout references was a mess too, a bunch of labels with no reference and i did not have the right keyword to search for until i somehow figure out “pinout diagrams” and i got everything i needed to hook them up
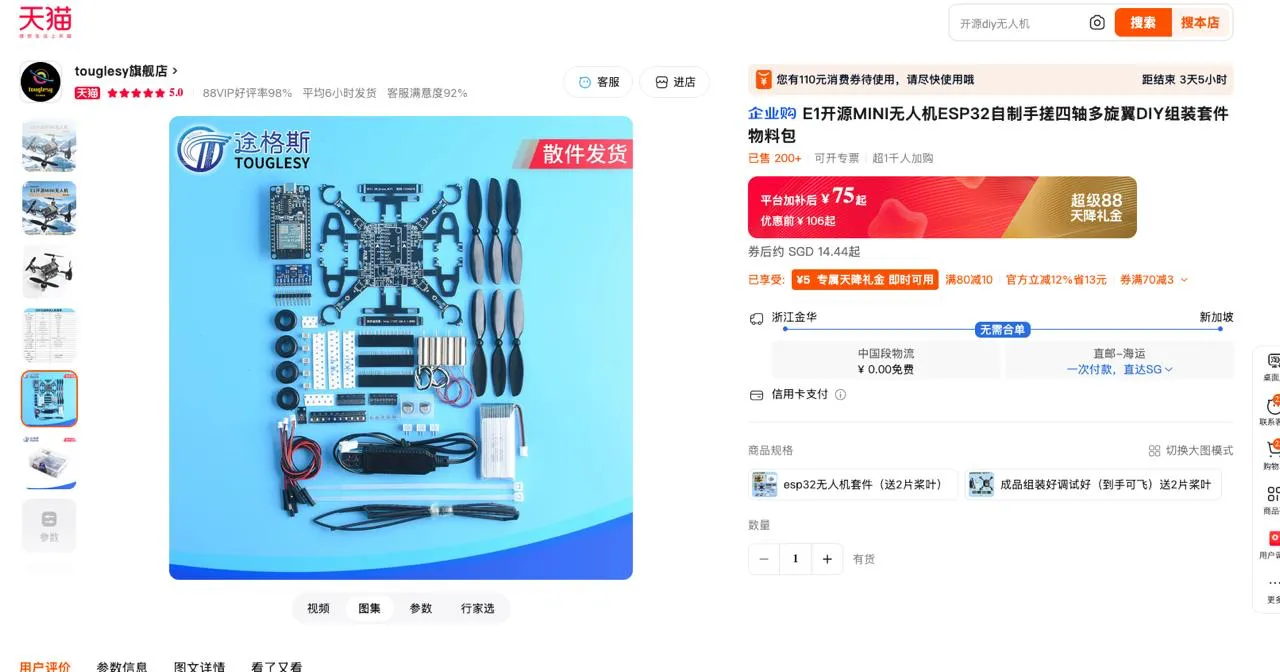
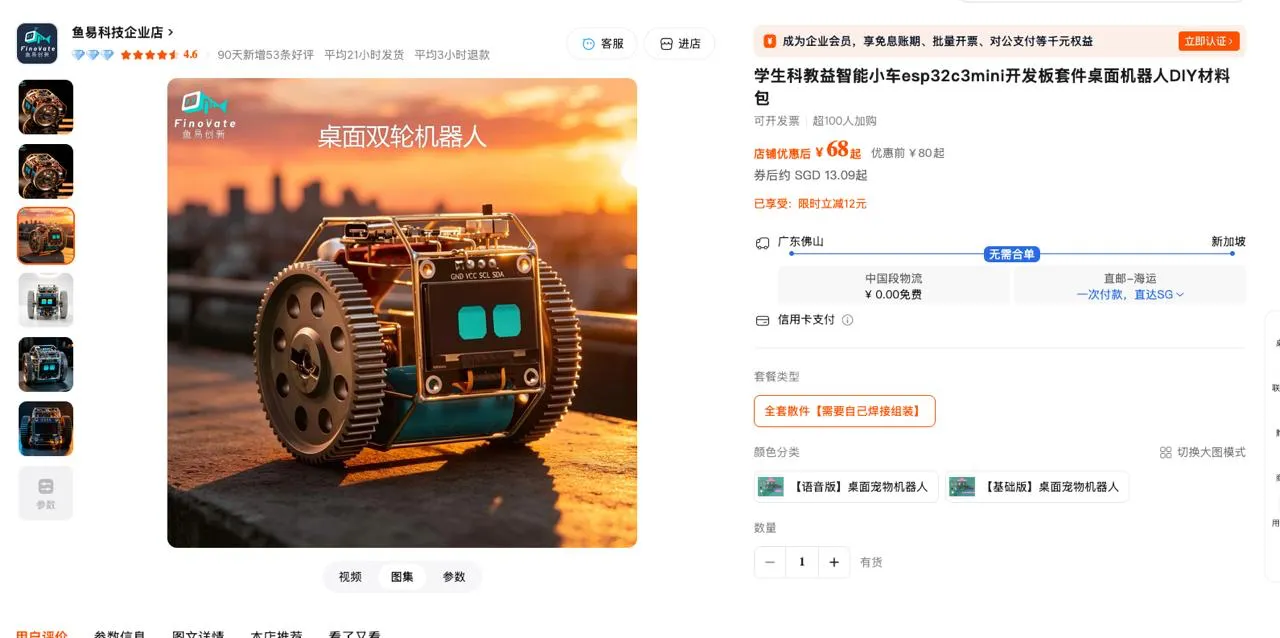
but all these were really enjoyable and i’m planning to do more, here are some sneak peaks to some other pre-built kits i’ve purchased to build out from taobao.
taobao is goated
drone kit
desk buddy
till next time!