Table of contents
Open Table of contents
Overview
I forgot pre-signed url exists for uploading assets such as images or files to an object storage service like R2 (cloudflare) or S3 (aws) without across the actual blob content to the our own server.
So here is a reminder to both of us :)
Here’s the link to the code: https://github.com/tanshunyuan/glob-guides/tree/main/presigned-url
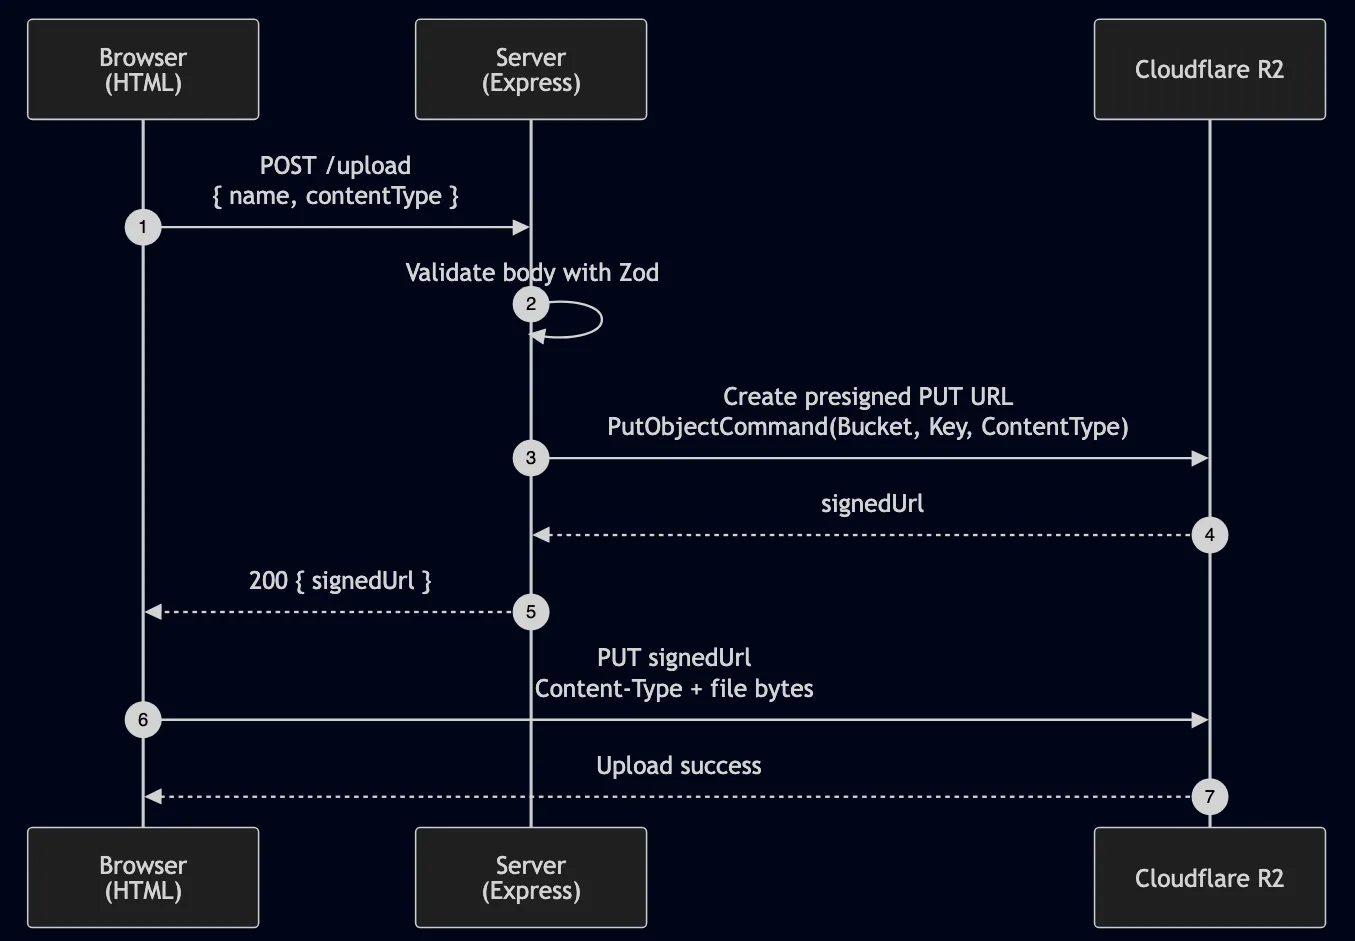
Architecture
Pre-Requisite
Before looking at the code, we need to a few things on Cloudflare R2 platform.
Creating a bucket
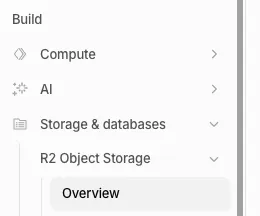
Login to https://pages.cloudflare.com/ , under the “Build” header on the sidebar, click on “Storage & databases > R2 Object Storage > Overview”
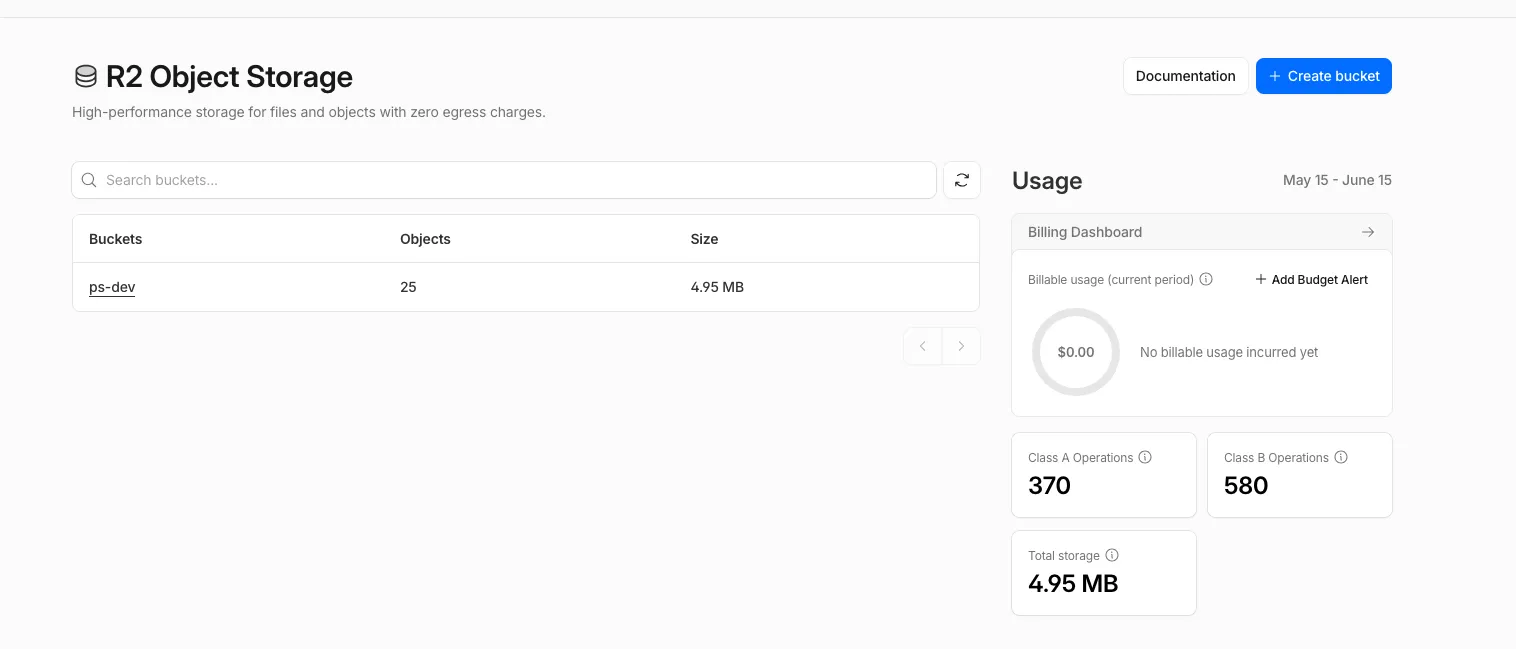
You’ll be redirected to this page, click on the ”+ Create bucket” button
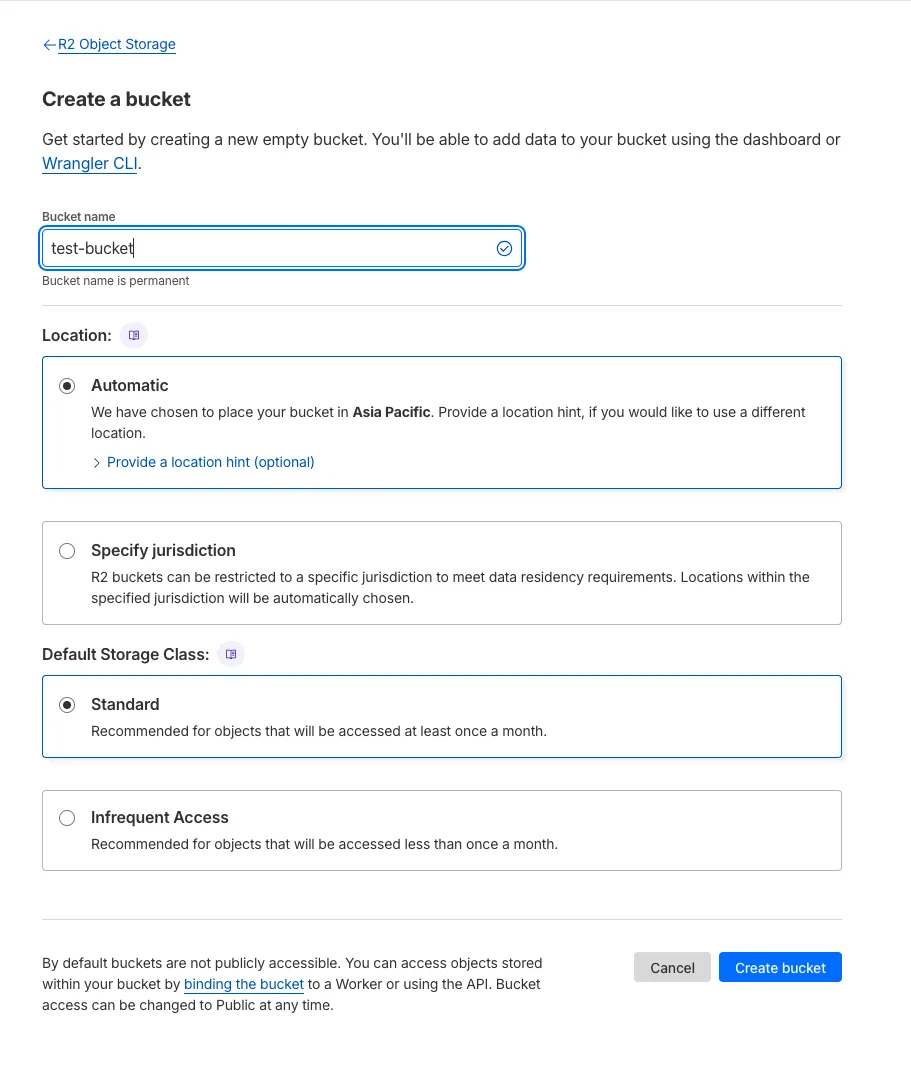
After clicking the button, fill up the information shown below, click “Create bucket” and a bucket will be created
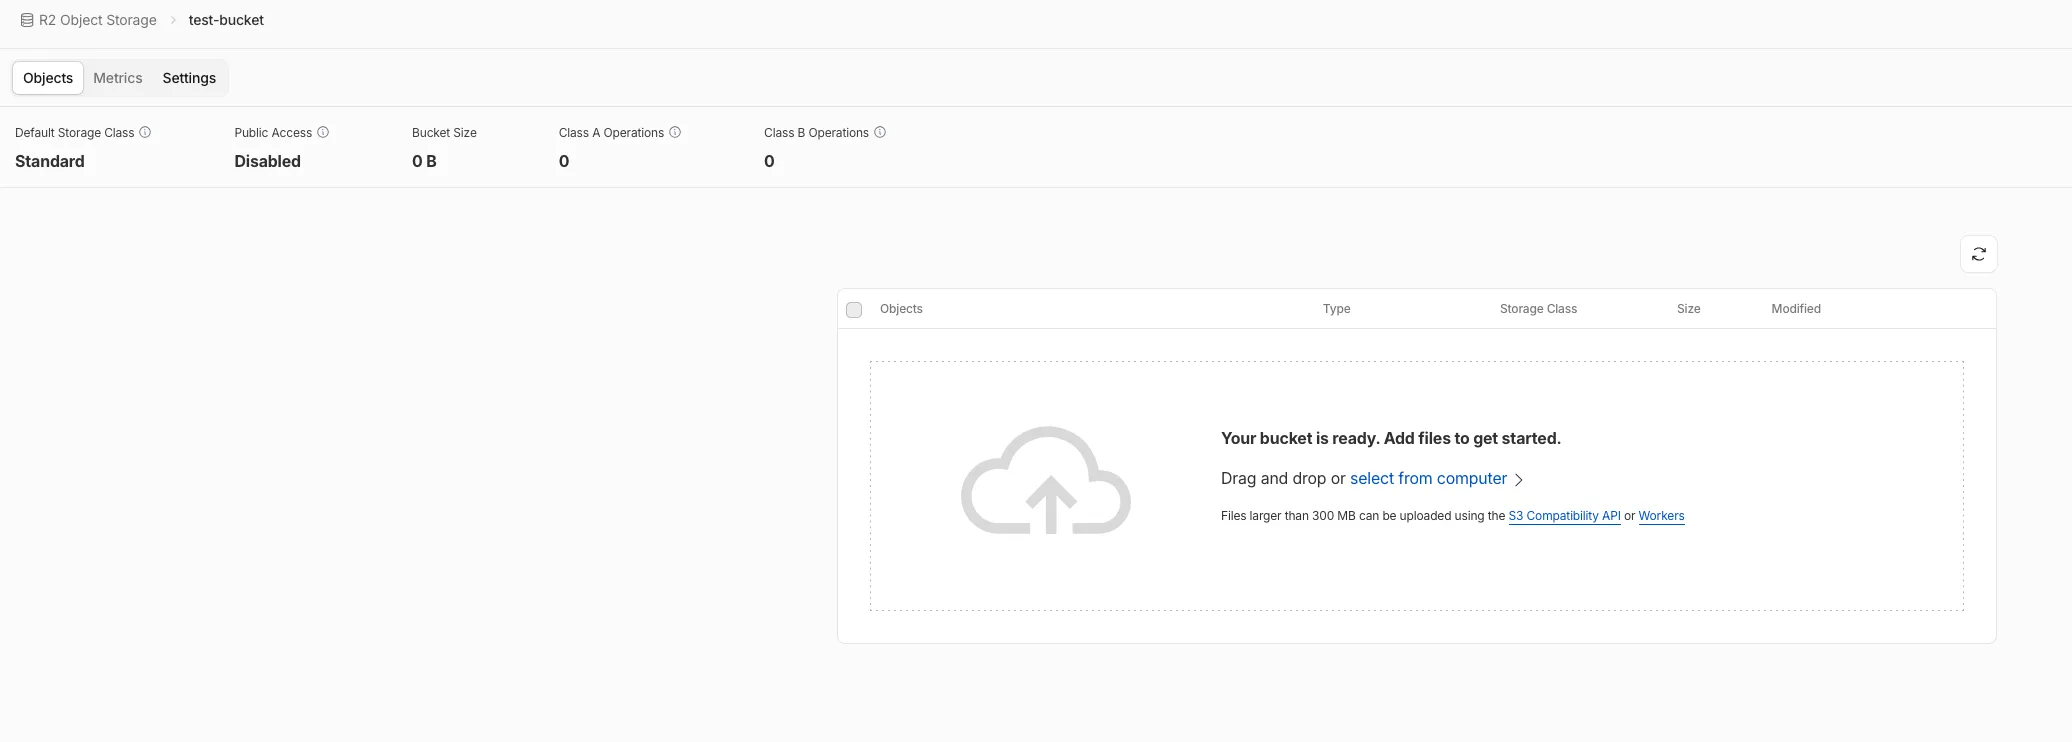
After the bucket is created, you’ll be redirected to the page for a bucket
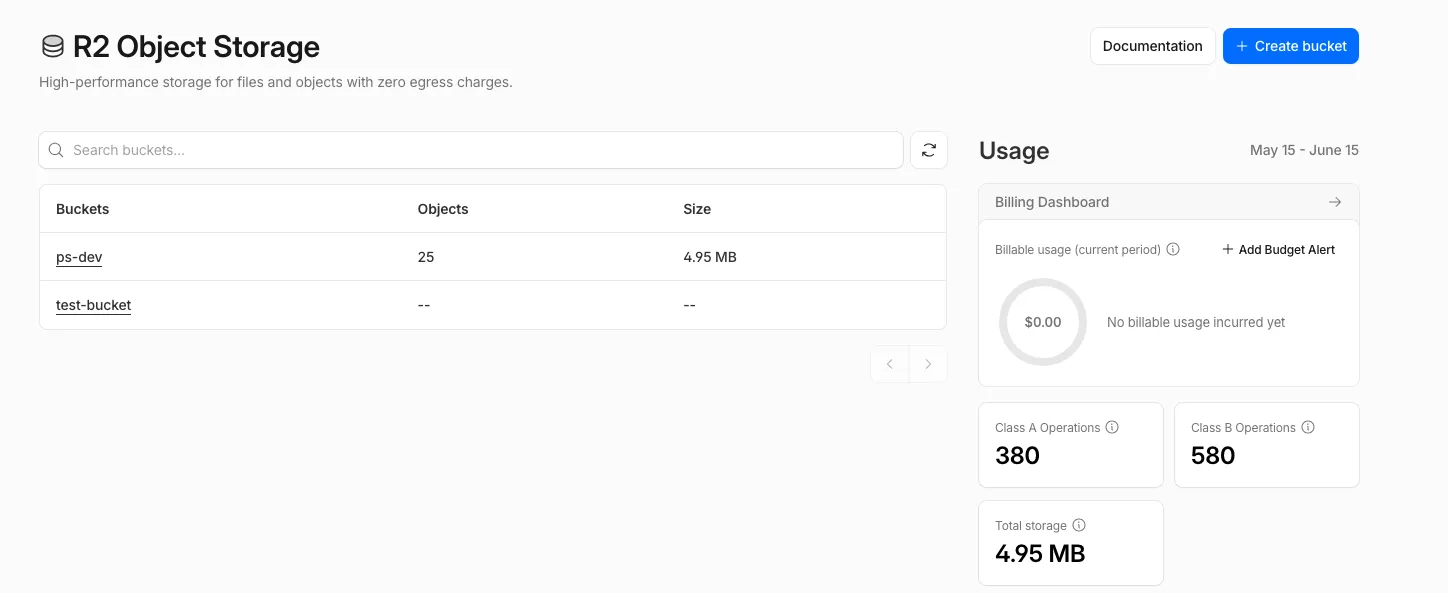
If we head to the home page, we can also see the newly created bucket (test-bucket)
Configure Bucket CORS
We’re uploading from the browser, so we need to update the bucket CORS policy to ensure that it accepts our browser origin. In this case, we’re running the client on http://localhost:3000
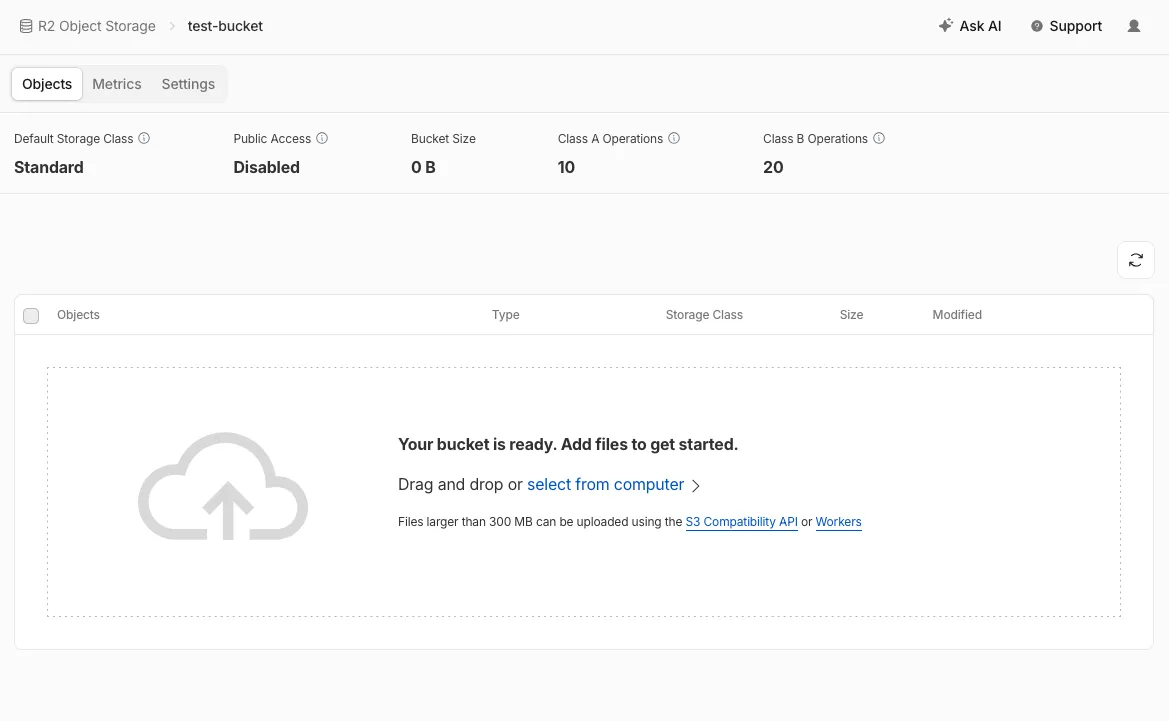
Click into the bucket, in this case its test-bucket
Click on “Settings”
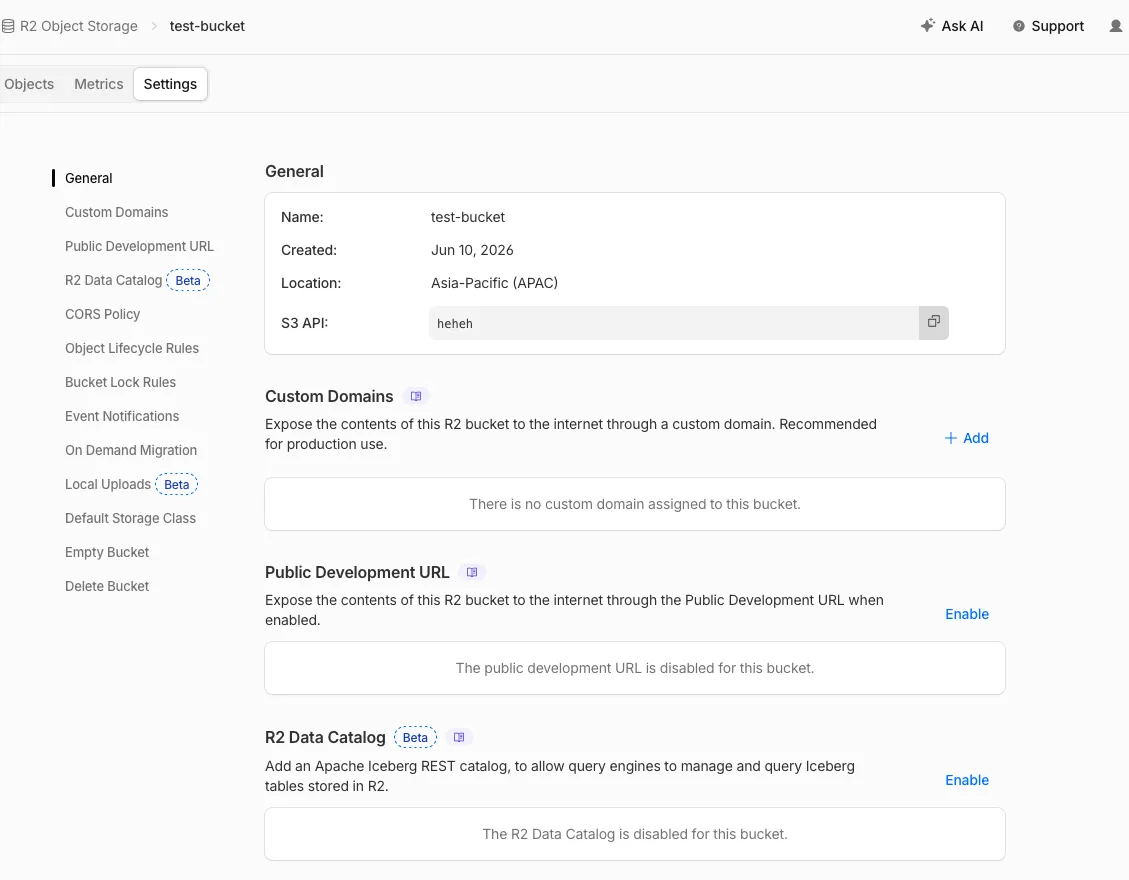
On the left sidebar, click on “CORS Policy”, and click the ”+ Add” button
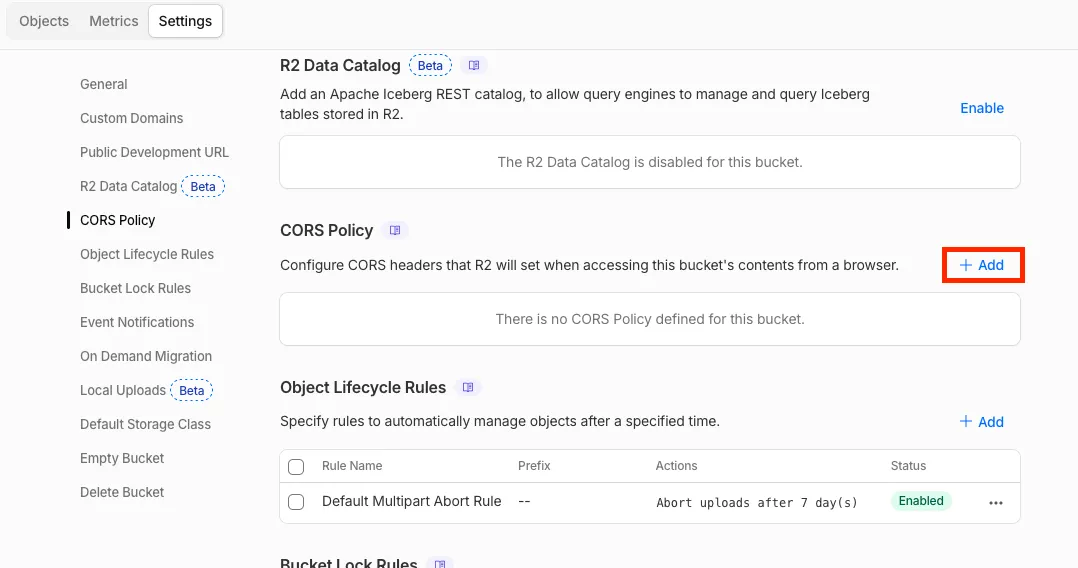
A right sidebar will popup regarding CORS Policy will pop up
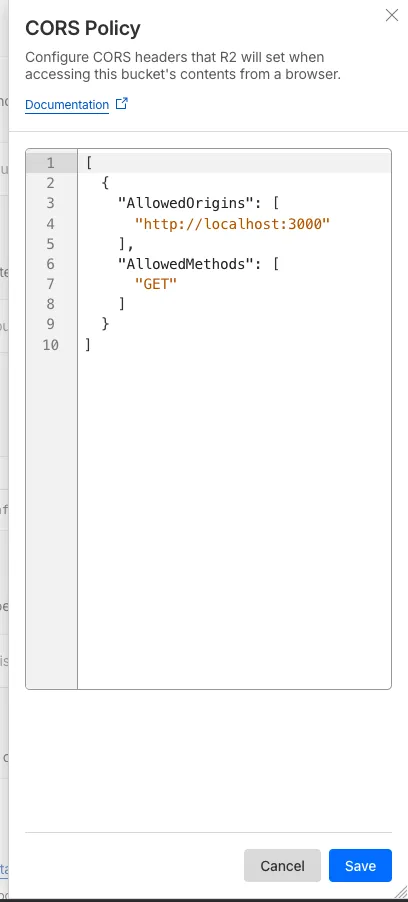
We’ll upload the policy with these values, and click “Save”
[
  {
    "AllowedOrigins": ["http://localhost:3000"],
    "AllowedMethods": ["GET", "PUT"],
    "AllowedHeaders": ["Content-Type"],
    "ExposeHeaders": ["ETag"]
  }
]
Find out more about what CORS policy to set here: https://developers.cloudflare.com/r2/buckets/cors/
After saving, the bucket CORS policy is updated
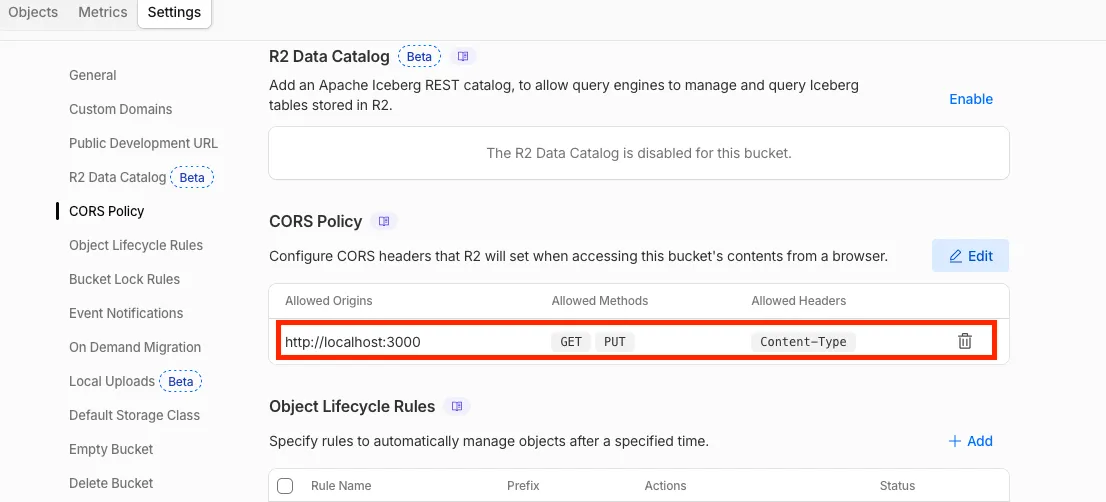
The bucket is now configured to accept a pre-signed url with a PUT request from the browser origin of http://localhost:3000
Credentials
We need these bucket credentials to programatically access it:
- CLOUDFLARE_R2_URL
- CLOUDFLARE_R2_ACCESS_KEY_ID
- CLOUDFLARE_R2_SECRET_ACCESS_KEY
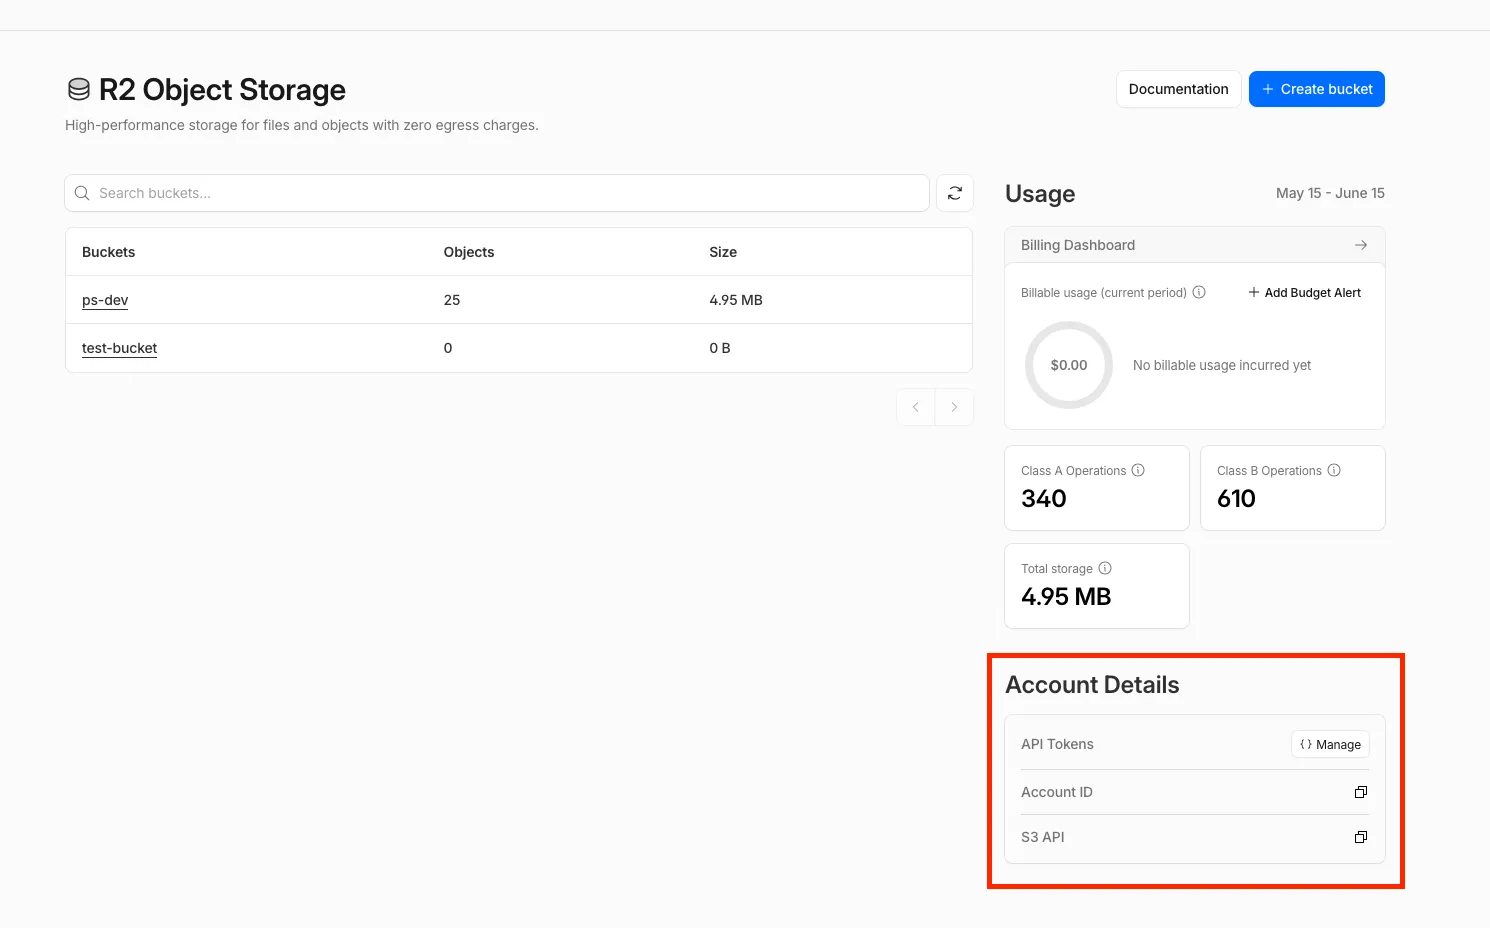
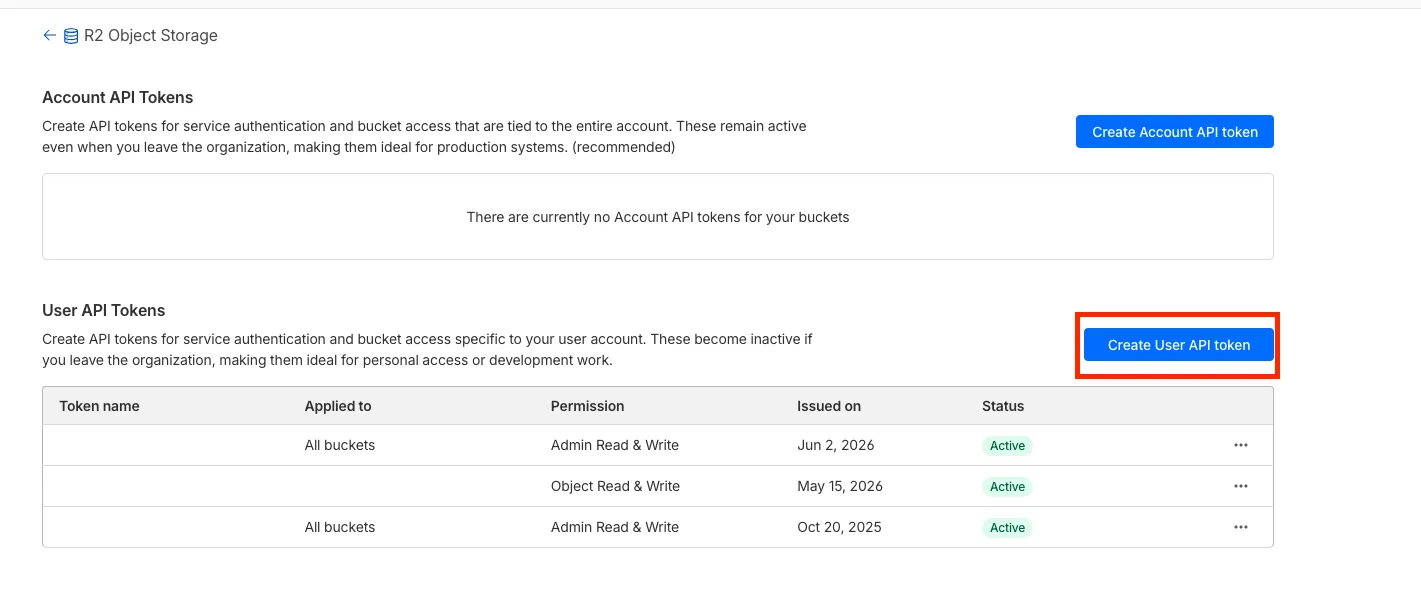
On the bottom right corner of the R2 homepage, click the “Manage” button in the red box
You’ll be redirected to this page where, you can CRUD your api keys. Click on “Create User API token”
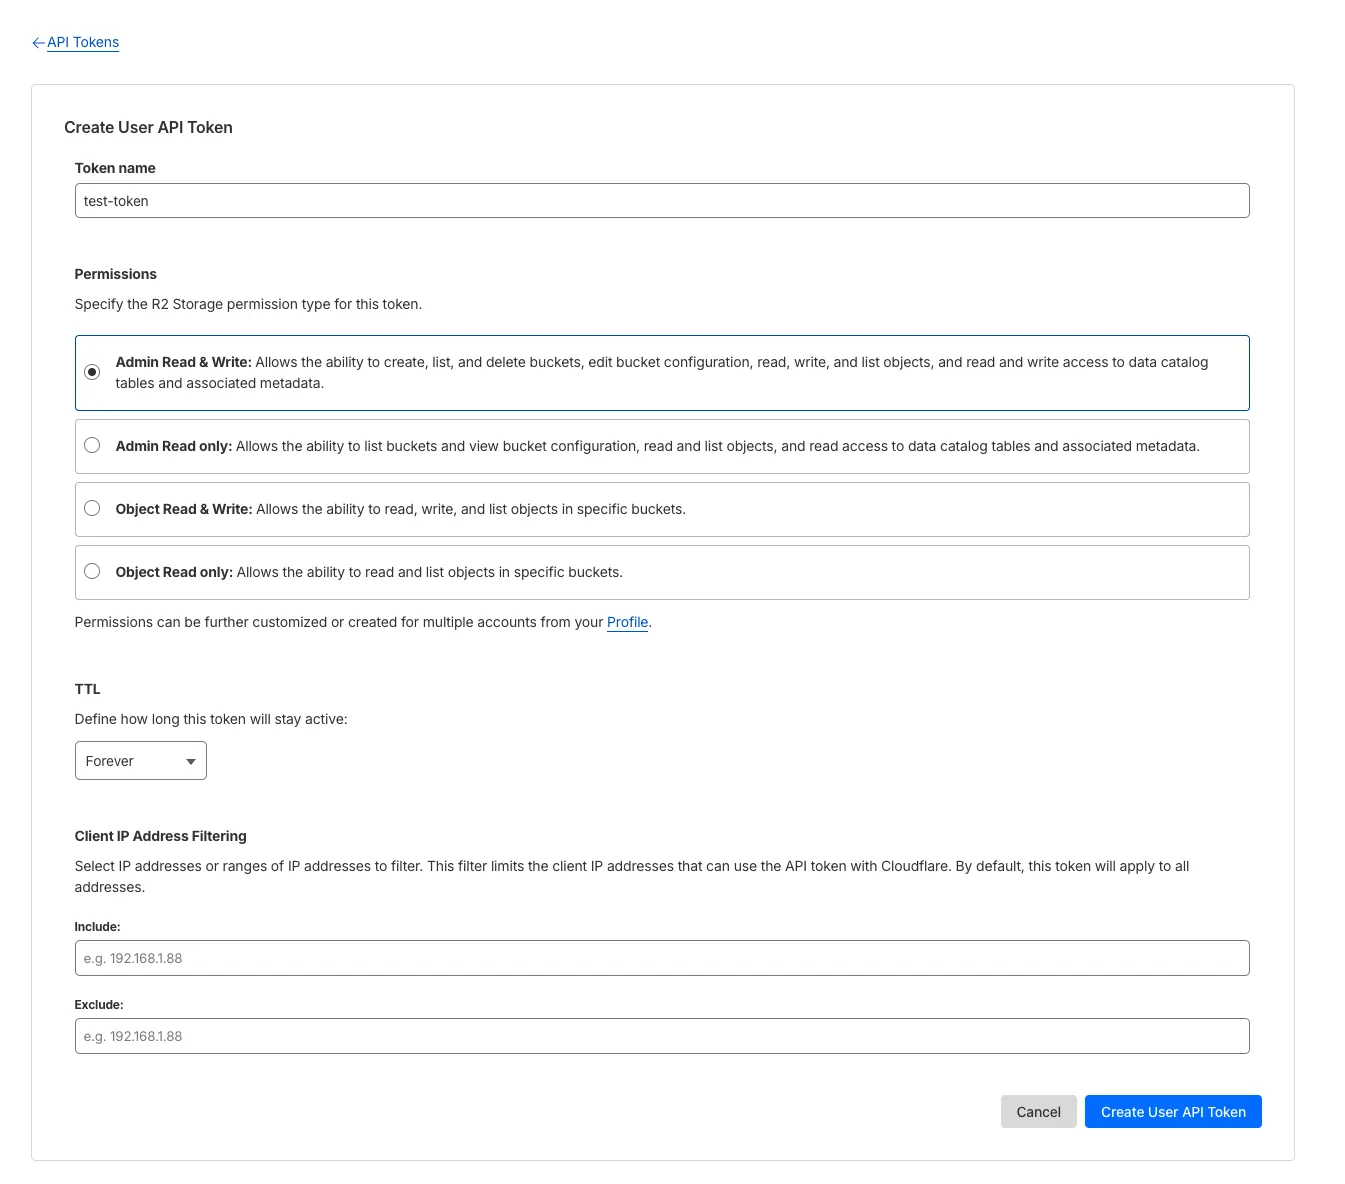
Choose a name for your token, and the permissions. Once you’re done click “Create User API Token”
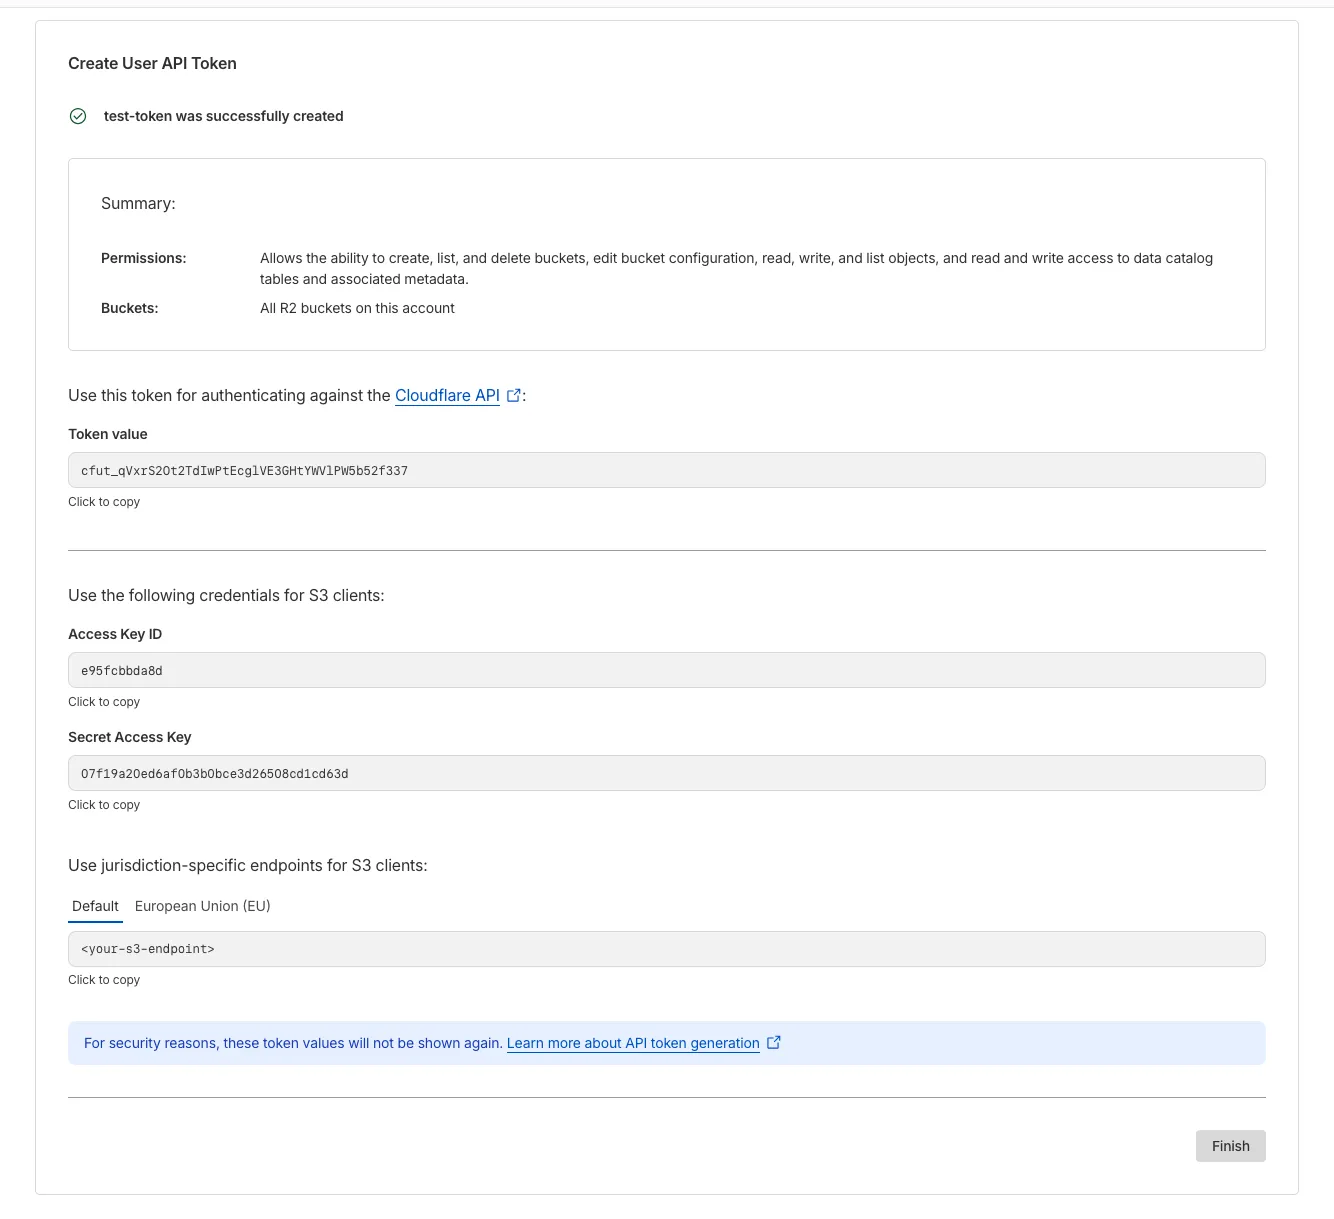
The credentials will be generated, copy the values and keep them somewhere you can access them
Code
Cloudflare R2 leverages on AWS S3 SDK for access to their object storage, we’ll need to install these two package to setup the S3 client and generate presigned-url
pnpm i @aws-sdk/client-s3 @aws-sdk/s3-request-presignerCloudflare doesn’t support all functions of AWS S3 SDK, read more here: https://developers.cloudflare.com/r2/api/s3/api/. But for this guide it’s enough
Creating the S3 Client
import { S3Client } from "@aws-sdk/client-s3";
import { env } from "../env.js";

const s3 = new S3Client({
  region: "auto", // Required by AWS SDK, not used by R2
  endpoint: env.CLOUDFLARE_R2_URL,
  credentials: {
    accessKeyId: env.CLOUDFLARE_R2_ACCESS_KEY_ID,
    secretAccessKey: env.CLOUDFLARE_R2_SECRET_ACCESS_KEY,
  },
});
We can use the S3 SDK alongside with cloudflare credentials, no extra setup is required on our end.
Generate Presigned URL
import express, { type Request, type Response } from "express";
import { getSignedUrl } from "@aws-sdk/s3-request-presigner";
import { PutObjectCommand } from "@aws-sdk/client-s3";
import z from "zod";

const UploadSchema = z.object({
  name: z.string(),
  contentType: z.string(),
});
app.post("/upload", async (req: Request, res: Response) => {
  try {
    const body = UploadSchema.parse(req.body);

    const signedUrl = await getSignedUrl(
      s3,
      new PutObjectCommand({
        Bucket: "ps-dev",
        Key: body.name,
        ContentType: body.contentType,
      }),
      { expiresIn: 3600 },
    );
    return res.status(200).json({ signedUrl });
  } catch (e) {
    if (e instanceof z.ZodError) {
      const pretty = z.prettifyError(e);
      return res.status(400).json(pretty);
    }
    console.log(e);
    return res.status(500).json("Unexpected Error");
  }
});
We only need to define two things: name and contentType of our asset we want to upload through our presigned url.
R2 will generate a presigned url and we need to send it back to the browser for the upload to occur
Fetch items uploaded from Presigned URL
import express, { type Request, type Response } from "express";
import { getSignedUrl } from "@aws-sdk/s3-request-presigner";
import { GetObjectCommand } from "@aws-sdk/client-s3";
import z from "zod";

app.get("/download", async (req: Request, res: Response) => {
  try {
    const name = z.string().min(1).parse(req.query.name);

    const signedUrl = await getSignedUrl(
      s3,
      new GetObjectCommand({
        Bucket: "test-bucket",
        Key: name,
      }),
      { expiresIn: 3600 },
    );

    return res.status(200).json({ signedUrl });
  } catch (e) {
    if (e instanceof z.ZodError) {
      const pretty = z.prettifyError(e);
      return res.status(400).json(pretty);
    }
    console.log(e);
    return res.status(500).json("Unexpected Error");
  }
});
By specificing the Key of our item, we can also use presigned url to retrieve the item we’ve uploaded.
Request and upload to Presigned URL
<!doctype html>
<html>
  <head>
    <title>Object Storage Client</title>
    <style>
      button {
        cursor: pointer;
        padding: 8px 14px;
      }

      button:disabled {
        cursor: not-allowed;
        opacity: 0.7;
      }

      #status {
        min-height: 24px;
        margin-bottom: 16px;
      }

      #uploaded-image {
        display: none;
        max-width: 100%;
        border-radius: 12px;
        box-shadow: 0 8px 24px rgb(0 0 0 / 14%);
      }
    </style>
  </head>
  <body>
    <form id="object-storage-form">
      <input id="file-input" name="content" type="file" accept="image/*" />
      <button id="submit-button" type="submit">Submit</button>
    </form>
    <p id="status" role="status"></p>
    <img id="uploaded-image" alt="Uploaded image" />
  </body>
  <script type="module">
    const BASE_URL = "http://localhost:8086";
    const objectStorageForm = document.getElementById("object-storage-form");
    const fileInput = document.getElementById("file-input");
    const submitButton = document.getElementById("submit-button");
    const statusMessage = document.getElementById("status");
    const uploadedImage = document.getElementById("uploaded-image");

    const setButtonState = (text, isDisabled) => {
      submitButton.textContent = text;
      submitButton.disabled = isDisabled;
    };

    const getDownloadUrl = async (fileName) => {
      const response = await fetch(
        `${BASE_URL}/download?name=${encodeURIComponent(fileName)}`,
      );

      if (!response.ok) {
        throw new Error(`Failed to create download URL: ${response.status}`);
      }

      const { signedUrl } = await response.json();
      return signedUrl;
    };

    const handleFormSubmit = async (event) => {
      event.preventDefault();

      const fileContent = fileInput.files[0];
      if (!fileContent) {
        statusMessage.textContent = "Pick an image first.";
        return;
      }

      setButtonState("Loading...", true);
      statusMessage.textContent = "Uploading image...";

      try {
        const requestBody = {
          name: fileContent.name,
          contentType: fileContent.type,
        };

        const response = await fetch(`${BASE_URL}/upload`, {
          headers: {
            "Content-Type": "application/json",
          },
          method: "POST",
          body: JSON.stringify(requestBody),
        });

        if (!response.ok) {
          throw new Error(`Failed to create signed URL: ${response.status}`);
        }

        const { signedUrl } = await response.json();

        const uploadResponse = await fetch(signedUrl, {
          method: "PUT",
          headers: {
            "Content-Type": fileContent.type,
          },
          body: fileContent,
        });

        if (!uploadResponse.ok) {
          throw new Error(`Failed to upload file: ${uploadResponse.status}`);
        }

        setButtonState("Done", true);
        statusMessage.textContent = "Image uploaded.";

        const downloadUrl = await getDownloadUrl(fileContent.name);
        uploadedImage.src = downloadUrl;
        uploadedImage.style.display = "block";
      } catch (error) {
        console.error(error);
        setButtonState("Submit", false);
        statusMessage.textContent = error.message;
      }
    };

    fileInput.addEventListener("change", () => {
      setButtonState("Submit", false);
      statusMessage.textContent = "";
      uploadedImage.style.display = "none";
      uploadedImage.removeAttribute("src");
    });

    objectStorageForm.addEventListener("submit", handleFormSubmit);
  </script>
</html>
Results
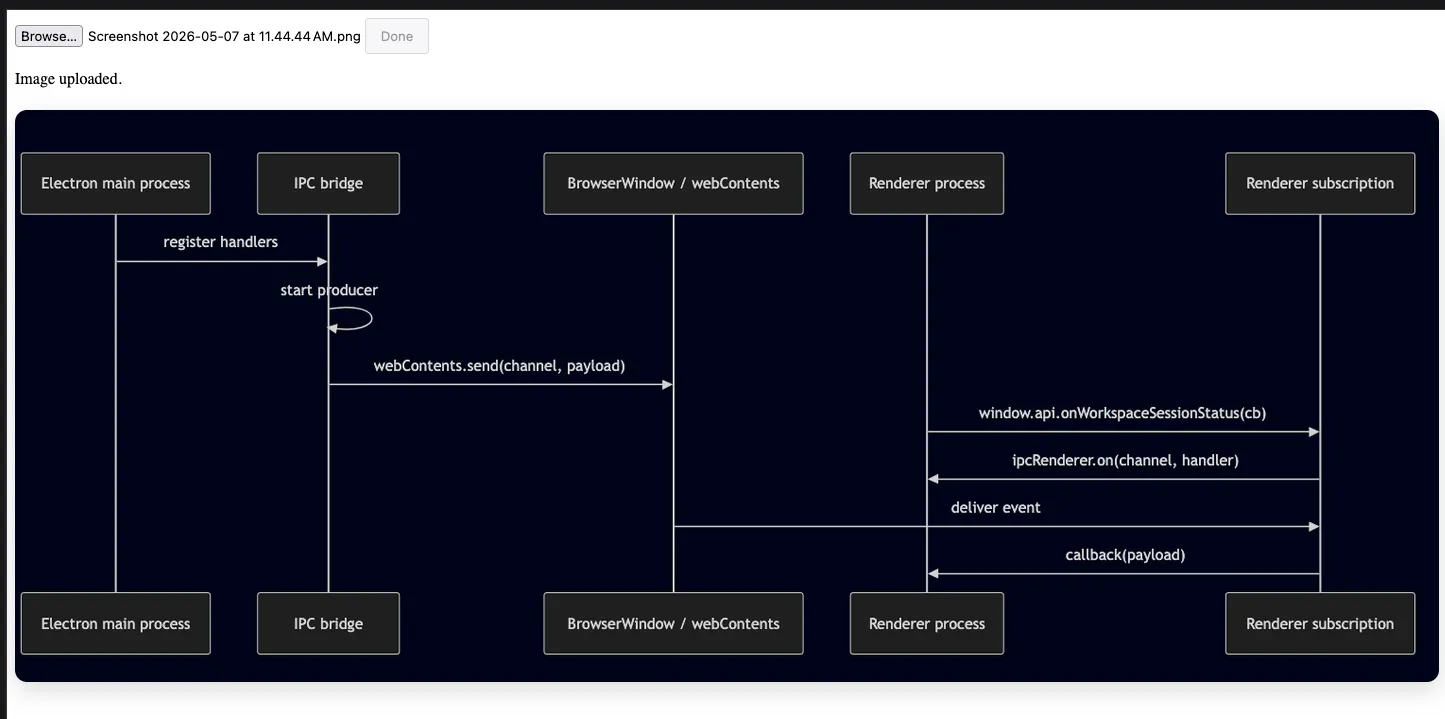
Browser Results
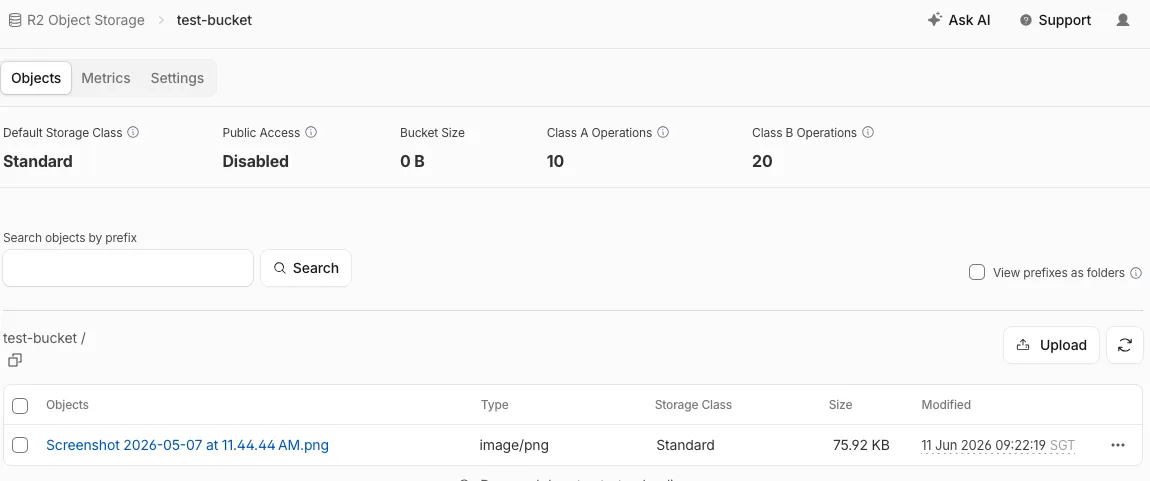
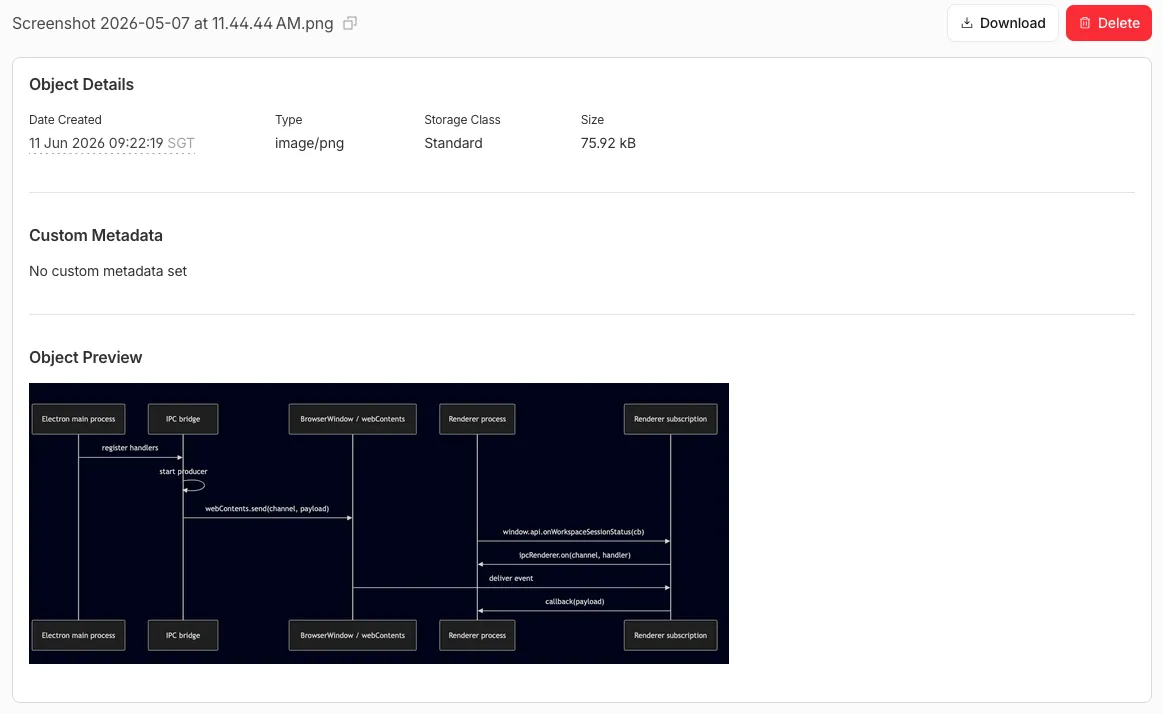
R2 Storage
Conclusion
I chose HTML and express to remind myself I don’t need too fancy of a frontend framework everytime. Sometimes simplicity is the best. I hope i’ll remember I wrote this and refer back to it